Difference between revisions of "Maps"
(→End of Match summary: edited a faulty number) |
|||
| (30 intermediate revisions by 8 users not shown) | |||
| Line 1: | Line 1: | ||
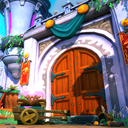
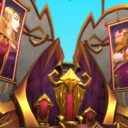
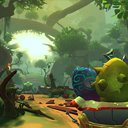
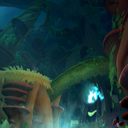
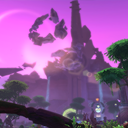
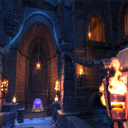
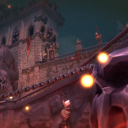
| − | Dungeon Defenders II is set in the fictional world of Etheria. You'll start in | + | Dungeon Defenders II is set in the fictional world of Etheria. You'll start in The Private [[Tavern]] or in The Heroes [[Marketplace]], the outdoor HUB. This is where you'll spend any time not in battle to sell, buy, manage, trade, tinker and test any gear you've found in combat. Etheria is broken down into playable maps to explore. Each map is an arena with set enemy spawners and objectives to defend. |
| − | == | + | |
| − | <gallery widths= | + | |
| − | + | ==Maps== | |
| − | + | ||
| − | + | ===[[Campaign]]=== | |
| − | + | ||
| − | + | <gallery widths=100px heights=100px mode="packed"> | |
| − | + | File:TheGatesofDragonfall_MapIcon.png|none|link=The Gates of Dragonfall|''[[The Gates of Dragonfall]]'' | |
| − | + | File:DragonfallBazaar_MapIcon.png|left|link=Dragonfall Bazaar|''[[Dragonfall Bazaar]]'' | |
| − | + | File:GreystonePlaza_MapIcon.png|link=Greystone Plaza|''[[Greystone Plaza]]'' | |
| − | + | File:TheRamparts_MapIcon.png|link=The Ramparts|''[[The Ramparts]]'' | |
| − | + | File:TheThroneRoom_MapIcon.png|link=The Throne Room|''[[The Throne Room]]'' | |
| − | + | File:ForestCrossroads_MapIcon.png|link=Forest Crossroads|''[[Forest Crossroads]]'' | |
| − | + | File:LiferootForest_MapIcon.png|link=Liferoot Forest|''[[Liferoot Forest]]'' | |
| − | + | File:TheWyvernDen_MapIcon.png|link=The Wyvern Den|''[[The Wyvern Den]]'' | |
| − | + | </gallery> | |
| − | + | ||
| − | + | === Adventures=== | |
| − | + | The Kobold Bling King | |
| − | + | <gallery widths=100px heights=100px mode="packed"> | |
| − | + | File:ForgottenRuins_MapIcon.png|link=Forgotten Ruins|''[[Forgotten Ruins]]'' | |
| − | + | File:NimbusReach_MapIcon.png|link=Nimbus Reach|''[[Nimbus Reach]]'' | |
| + | File:LittleHornValley_MapIcon.png|link=Little-Horn Valley|''[[The Kobold Bling King]]'' | ||
| + | </gallery> | ||
| + | |||
| + | Mal'Donis The Terrible | ||
| + | <gallery widths=100px heights=100px mode="packed"> | ||
| + | File:TheDeadRoad_MapIcon.png|link=The Dead Road|''[[The Dead Road]]'' | ||
| + | File:TempleOfTheNecrotic_MapIcon.png|link=Temple Of The Necrotic|''[[Temple Of The Necrotic]]'' | ||
| + | </gallery> | ||
| + | |||
| + | The Harbinger | ||
| + | <gallery widths=100px heights=100px mode="packed"> | ||
| + | File:RampartsSiege_MapIcon.png|link=Ramparts Siege|''[[Ramparts Siege]]'' | ||
| + | File:AssaultOnThroneRoom_MapIcon.png|link=Assault On Throne Room|''[[Assault On Throne Room]]'' | ||
| + | File:HarbingersWarship_MapIcon.png|link=Harbinger's Warship|''[[Harbinger's Warship]]'' | ||
| + | </gallery> | ||
| + | |||
| + | Isle Of Dread | ||
| + | <gallery widths=100px heights=100px mode="packed"> | ||
| + | File:TheJackedSparrow_MapIcon.png|link=The Jacked Sparrow|''[[The Jacked Sparrow]]'' | ||
| + | File:PlunderersParadise_MapIcon.png|link=Plunderer's Paradise|''[[Plunderer's Paradise]]'' | ||
| + | </gallery> | ||
| + | |||
| + | The Sacrificial Warden | ||
| + | <gallery widths=100px heights=100px mode="packed"> | ||
| + | File:DrakenfrostResort_MapIcon.png|link=Drakenfrost Resort|''[[Drakenfrost Resort]]'' | ||
| + | File:DrakenfrostKeep_MapIcon.png|link=Drakenfrost Keep|''[[Drakenfrost Keep]]'' | ||
</gallery> | </gallery> | ||
| − | < | + | === Expeditions=== |
| + | Dragonfall Town | ||
| + | <gallery widths=100px heights=100px mode="packed"> | ||
| + | File:TheGatesofDragonfall_MapIcon.png|none|link=The Gates of Dragonfall|''[[The Gates of Dragonfall]]'' | ||
| + | File:DragonfallBazaar_MapIcon.png|left|link=Dragonfall Bazaar|''[[Dragonfall Bazaar]]'' | ||
| + | File:GreystonePlaza_MapIcon.png|link=Greystone Plaza|''[[Greystone Plaza]]'' | ||
| + | File:LittleHornValley_MapIcon.png|link=Little-Horn Valley|''[[Little-Horn Valley]]'' | ||
| + | </gallery> | ||
| − | + | Dragonfall Castle | |
| − | + | <gallery widths=100px heights=100px mode="packed"> | |
| − | + | File:TheRamparts_MapIcon.png|link=The Ramparts|''[[The Ramparts]]'' | |
| − | + | File:TheThroneRoom_MapIcon.png|link=The Throne Room|''[[The Throne Room]]'' | |
| − | + | File:RampartsSiege_MapIcon.png|link=Ramparts Siege|''[[Ramparts Siege]]'' | |
| − | + | File:AssaultOnThroneRoom_MapIcon.png|link=Assault On Throne Room|''[[Assault On Throne Room]]'' | |
| − | + | </gallery> | |
| − | |||
| − | |||
| − | |||
| − | |||
| − | |||
| − | |||
| − | |||
| − | |||
| − | |||
| − | |||
| − | + | Lost Dungeons | |
| − | + | <gallery widths=100px heights=100px mode="packed"> | |
| − | + | File:UnholyCatacombs_MapIcon.png|link=Unholy Catacombs|''[[Unholy Catacombs]]'' | |
| − | + | File:BuriedBastille_MapIcon.png|link=Buried Bastille|''[[Buried Bastille]]'' | |
| − | + | File:MoltenCitadel_MapIcon.png|link=Molten Citadel|''[[Molten Citadel]]'' | |
| − | + | File:CrumbledBulwark_MapIcon.png|link=Crumbled Bulwark|''[[Crumbled Bulwark]]'' | |
| − | + | ||
| − | + | </gallery> | |
| − | + | ||
| − | + | The Liferoot | |
| − | + | <gallery widths=100px heights=100px mode="packed"> | |
| − | + | File:LiferootForest_MapIcon.png|link=Liferoot Forest|''[[Liferoot Forest]]'' | |
| − | + | File:ForestCrossroads_MapIcon.png|link=Forest Crossroads|''[[Forest Crossroads]]'' | |
| − | + | File:ForestBiome_MapIcon.png|link=Forest Biome|''[[Forest Biome]]'' | |
| − | + | </gallery> | |
| − | + | ||
| − | + | Ancient Ruins | |
| − | + | <gallery widths=100px heights=100px mode="packed"> | |
| − | + | File:ForgottenRuins_MapIcon.png|link=Forgotten Ruins|''[[Forgotten Ruins]]'' | |
| − | + | File:NimbusReach_MapIcon.png|link=Nimbus Reach|''[[Nimbus Reach]]'' | |
| − | + | </gallery> | |
| − | + | ||
| − | + | Rotting Ravine | |
| − | + | <gallery widths=100px heights=100px mode="packed"> | |
| − | + | File:SiphonSiteD_MapIcon.png|link=Siphon Site D|''[[Siphon Site D]]'' | |
| − | + | File:DragonfallSewers_MapIcon.png|link=Dragonfall Sewers|''[[Dragonfall Sewers]]'' | |
| − | + | File:TheDeadRoad_MapIcon.png|link=The Dead Road|''[[The Dead Road]]'' | |
| − | + | File:TempleOfTheNecrotic_MapIcon.png|link=Temple Of The Necrotic|''[[Temple Of The Necrotic]]'' | |
| − | + | </gallery> | |
| − | + | ||
| − | + | The High Seas | |
| − | + | <gallery widths=100px heights=100px mode="packed"> | |
| − | + | File:TheJackedSparrow_MapIcon.png|link=The Jacked Sparrow|''[[The Jacked Sparrow]]'' | |
| − | + | File:PlunderersParadise_MapIcon.png|link=Plunderer's Paradise|''[[Plunderer's Paradise]]'' | |
| − | + | </gallery> | |
| − | + | ||
| − | + | Drakenfrost | |
| − | + | <gallery widths=100px heights=100px mode="packed"> | |
| − | + | File:DrakenfrostResort_MapIcon.png|link=Drakenfrost Resort|''[[Drakenfrost Resort]]'' | |
| − | + | File:DrakenfrostKeep_MapIcon.png|link=Drakenfrost Keep|''[[Drakenfrost Keep]]'' | |
| − | + | </gallery> | |
| − | + | ||
| − | + | ||
| − | + | === Incursions=== | |
| − | + | Chaos 1 | |
| − | + | <gallery widths=100px heights=100px mode="packed"> | |
| − | + | File:TheGatesofDragonfall_MapIcon.png|none|link=The Gates of Dragonfall#Incursion|''[[The Gates of Dragonfall#Incursion|Griblok's Horde]]'' | |
| − | + | File:ForgottenRuins_MapIcon.png|link=Forgotten Ruins#Incursion|''[[Forgotten Ruins#Incursion|Chrome Enemies]]'' | |
| − | + | </gallery> | |
| − | + | ||
| − | + | Chaos 2 | |
| − | + | <gallery widths=100px heights=100px mode="packed"> | |
| − | + | File:ForestCrossroads_MapIcon.png|link=Forest Crossroads#Incursion|''[[Forest Crossroads#Incursion|Wyvern Enthusiasts]]'' | |
| − | + | File:LiferootForest_MapIcon.png|link=Liferoot Forest#Incursion|''[[Liferoot Forest#Incursion|Forest Poachers]]'' | |
| − | + | </gallery> | |
| − | + | ||
| − | + | Chaos 3 | |
| − | + | <gallery widths=100px heights=100px mode="packed"> | |
| − | + | File:LittleHornValley_MapIcon.png|link=Little-Horn Valley#Incursion|''[[Little-Horn Valley#Incursion|Kobold Bling King]]'' | |
| − | + | File:ForestBiome_MapIcon.png|link=Forest Biome#Incursion|''[[Forest Biome#Incursion|Dawn of the Blood Moon]]'' | |
| − | + | </gallery> | |
| − | + | ||
| − | + | Chaos 4 | |
| − | + | <gallery widths=100px heights=100px mode="packed"> | |
| − | + | File:UnholyCatacombs_MapIcon.png|link=Unholy Catacombs#Incursion|''[[Unholy Catacombs#Incursion|Unholy Catacombs]]'' | |
| − | + | File:MoltenCitadel_MapIcon.png|link=Molten Citadel#Incursion|''[[Molten Citadel#Incursion|The Demon's Lair]]'' | |
| − | + | </gallery> | |
| − | + | ||
| − | + | Chaos 5 | |
| − | + | <gallery widths=100px heights=100px mode="packed"> | |
| − | + | File:CrumbledBulwark_MapIcon.png|link=Crumbled Bulwark#Incursion|''[[Crumbled Bulwark#Incursion|Altar of the Althame]]'' | |
| − | + | File:DragonfallBazaar_MapIcon.png|left|link=Dragonfall Bazaar#Incursion|''[[Dragonfall Bazaar#Incursion|Power Surge]]'' | |
| − | + | </gallery> | |
| − | + | ||
| − | + | Chaos 6 | |
| − | + | <gallery widths=100px heights=100px mode="packed"> | |
| − | + | File:TheRamparts_MapIcon.png|link=The Ramparts#Incursion|''[[The Ramparts#Incursion|Malthius]]'' | |
| − | + | File:TempleOfTheNecrotic_MapIcon.png|link=Temple Of The Necrotic|''[[Temple Of The Necrotic]]'' | |
| − | + | </gallery> | |
| − | + | ||
| − | + | Chaos 7 | |
| − | + | <gallery widths=100px heights=100px mode="packed"> | |
| − | + | File:BuriedBastille_MapIcon.png|link=Buried Bastille#Incursion|''[[Buried Bastille#Incursion|Bastille Master]]'' | |
| − | + | File:DrakenfrostResort_MapIcon.png|link=Drakenfrost Resort#Incursion|''[[Drakenfrost Resort#Incursion|Revenge of the Yeti]]'' | |
| − | + | File:PlunderersParadise_MapIcon.png|link=Plunderer's Paradise#Incursion|''[[Plunderer's Paradise#Incursion|Dark Awakening]]'' | |
| − | + | </gallery> | |
| − | + | ||
| − | + | ===Onslaught=== | |
| + | Onslaught contains all previously named maps and has it's very own map on every 5th floor you do called ''[[The Lost Temple]]'' | ||
| + | <gallery widths=100px heights=100px mode="packed"> | ||
| + | File:TheLostTemple_MapIcon.png|link=The Lost Temple|''[[The Lost Temple]]'' | ||
| + | </gallery> | ||
==Objectives== | ==Objectives== | ||
There are two types of Objectives for Heroes to be concerned with. The Main Objectives or Main Cores are defense points on maps that, if destroyed, end the current map. The Sub Objectives or Sub Cores are defense points on maps that, if destroyed, open up a new spawn point for [[Enemies]] in the next wave. | There are two types of Objectives for Heroes to be concerned with. The Main Objectives or Main Cores are defense points on maps that, if destroyed, end the current map. The Sub Objectives or Sub Cores are defense points on maps that, if destroyed, open up a new spawn point for [[Enemies]] in the next wave. | ||
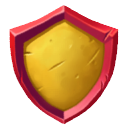
| − | ==Main Objective Mechanics== | + | ===Main Objective Mechanics=== |
[[File:Red Shield.png|thumb|right]] | [[File:Red Shield.png|thumb|right]] | ||
*Main Objectives can be identified by the spinning red trimmed yellow shield above them. | *Main Objectives can be identified by the spinning red trimmed yellow shield above them. | ||
| Line 146: | Line 173: | ||
*Main Objectives have the highest target priority for the [[Aggression]] of nearby [[Enemies]]. | *Main Objectives have the highest target priority for the [[Aggression]] of nearby [[Enemies]]. | ||
| − | ==Sub Objective Mechanics== | + | ===Sub Objective Mechanics=== |
[[File:Grey Shield.png|thumb|right]] | [[File:Grey Shield.png|thumb|right]] | ||
*Sub Objectives can be identified by the spinning Grey shield above them. | *Sub Objectives can be identified by the spinning Grey shield above them. | ||
| Line 158: | Line 185: | ||
*Keeping Sub Objectives alive til the end of the map will yield bonus experience. | *Keeping Sub Objectives alive til the end of the map will yield bonus experience. | ||
| − | ==End | + | ==End of Match summary== |
| − | + | At the end of a map you will be given a Match Overview. In this overview you will find who played the map with you, as well as the Awards section.<br /> | |
| − | + | Each map awards a certain amount of ''[[Defender Medals]]'', ''[[Gold]]'', ''[[XP]]'' and ''[[Score]]''.<br /><br /> | |
| − | + | ||
| + | To increase your score, check the ''[[Score Multipliers]]''. | ||
| + | {| class="wikitable" | ||
|- | |- | ||
| − | + | ! Type !! Difficulty !! Defender Medals !! Gold !! XP without Sub Objective !! XP with Sub Objective | |
| − | |||
| − | |||
| − | |||
| − | |||
| − | |||
| − | |||
| − | |||
| − | |||
| − | |||
| − | |||
| − | |||
| − | |||
|- | |- | ||
| − | | | + | | Campaign || Normal & Hard|| 5 || 5,000 || 345,000 || 411,000 |
|- | |- | ||
| − | | | + | | Expeditions|| Chaos 1 || 23 || 21,000|| 790,000 || 910,000 |
|- | |- | ||
| − | | | + | ||| Chaos 2 || 23 || 27,000 || 1,350,000 || 1,600,000 |
|- | |- | ||
| − | | | + | ||| Chaos 3 || 23 || 33,500 || 1,900,000 || 2,250,000 |
|- | |- | ||
| − | | | + | ||| Chaos 4 || 23 || 40,000 || 2,500,000 || 2,900,000 |
|- | |- | ||
| − | | | + | ||| Chaos 5 || 23 || 46,000 || 2,680,000 || 3,600,000 |
|- | |- | ||
| − | | | + | ||| Chaos 6 || 23 || 53,00 || 3,700,000 || 4,300,000 |
|- | |- | ||
| − | | | + | ||| Chaos 7 || 23 || 59,000 || 4,300,000 || 5,000,000 |
|- | |- | ||
| − | | | + | | Onslaught || Any || 25 || Floor Dependent || Floor and Map Dependent || Floor and Map Dependent |
| − | |||
| − | |||
| − | |||
| − | |||
| − | |||
| − | |||
| − | |||
| − | |||
| − | |||
| − | |||
| − | |||
| − | |||
| − | |||
| − | |||
|} | |} | ||
| + | |||
[[Category:Dungeon Defenders 2]] | [[Category:Dungeon Defenders 2]] | ||
Revision as of 18:12, 21 December 2018
Dungeon Defenders II is set in the fictional world of Etheria. You'll start in The Private Tavern or in The Heroes Marketplace, the outdoor HUB. This is where you'll spend any time not in battle to sell, buy, manage, trade, tinker and test any gear you've found in combat. Etheria is broken down into playable maps to explore. Each map is an arena with set enemy spawners and objectives to defend.
Contents
Maps
Campaign

Adventures
The Kobold Bling King
Mal'Donis The Terrible
The Harbinger
Isle Of Dread


The Sacrificial Warden


Expeditions
Dragonfall Town
Dragonfall Castle
Lost Dungeons

The Liferoot

Ancient Ruins
Rotting Ravine
The High Seas
Drakenfrost
Incursions
Chaos 1
Chaos 2
Chaos 3
Chaos 4
Chaos 5
Chaos 6
Chaos 7
Onslaught
Onslaught contains all previously named maps and has it's very own map on every 5th floor you do called The Lost Temple
Objectives
There are two types of Objectives for Heroes to be concerned with. The Main Objectives or Main Cores are defense points on maps that, if destroyed, end the current map. The Sub Objectives or Sub Cores are defense points on maps that, if destroyed, open up a new spawn point for Enemies in the next wave.
Main Objective Mechanics
- Main Objectives can be identified by the spinning red trimmed yellow shield above them.
- Main Objectives are marked on the mini-map with a red trimmed yellow Shield Icon.
- Main Objectives have a Health Pool. This gets fully healed at the start of each build phase. If the Health Pool is reduced to 0, the Main Objective is destroyed.
- The players lose if the Main Objective is destroyed.
- Main Objectives are fixed for each map and wont change.
- Main Objectives have the highest target priority for the Aggression of nearby Enemies.
Sub Objective Mechanics
- Sub Objectives can be identified by the spinning Grey shield above them.
- Sub Objectives are marked on the mini-map with a Grey Shield Icon.

- Sub Objectives have a Health Pool. This gets fully healed at the start of each build phase. If the Health Pool is reduced to 0, the Sub Objective is destroyed.
- The Wave after a Sub Objective is destroyed will spawn Enemies from an additional spawn point.
- Having a Sub Objective get destroyed does not end the map.
- Billboards for these additional spawn points do not appear until the connected Sub Objective is destroyed.
- Sub Objectives and the extra spawn points they open are fixed for each map and wont change.
- Sub Objectives have the highest target priority for the Aggression of nearby Enemies
- Keeping Sub Objectives alive til the end of the map will yield bonus experience.
End of Match summary
At the end of a map you will be given a Match Overview. In this overview you will find who played the map with you, as well as the Awards section.
Each map awards a certain amount of Defender Medals, Gold, XP and Score.
To increase your score, check the Score Multipliers.
| Type | Difficulty | Defender Medals | Gold | XP without Sub Objective | XP with Sub Objective |
|---|---|---|---|---|---|
| Campaign | Normal & Hard | 5 | 5,000 | 345,000 | 411,000 |
| Expeditions | Chaos 1 | 23 | 21,000 | 790,000 | 910,000 |
| Chaos 2 | 23 | 27,000 | 1,350,000 | 1,600,000 | |
| Chaos 3 | 23 | 33,500 | 1,900,000 | 2,250,000 | |
| Chaos 4 | 23 | 40,000 | 2,500,000 | 2,900,000 | |
| Chaos 5 | 23 | 46,000 | 2,680,000 | 3,600,000 | |
| Chaos 6 | 23 | 53,00 | 3,700,000 | 4,300,000 | |
| Chaos 7 | 23 | 59,000 | 4,300,000 | 5,000,000 | |
| Onslaught | Any | 25 | Floor Dependent | Floor and Map Dependent | Floor and Map Dependent |