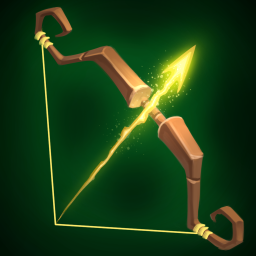
Difference between revisions of "Skeletal Archer"
| (10 intermediate revisions by 4 users not shown) | |||
| Line 1: | Line 1: | ||
| − | + | {{{{#ifeq:{{PAGENAME}}|Skeletal Archer|Hero_Defense|{{#ifeq:{{PAGENAME}}|Calculator/Defenses|:Test_Calc_Math|{{#ifeq:{{PAGENAME}}|Abyss Lord|:Hero/List|:Test_Table/Data}}}}}} | |
| − | |||
| − | {{{{#ifeq:{{PAGENAME}}| | ||
|Hero=Abyss Lord | |Hero=Abyss Lord | ||
| − | |Type= | + | |Type=Tower |
| − | |Name= | + | |Name=Skeletal Archer |
| − | |Overview=Skeletal Archers are a unique defense that can defend two lanes at once. Archers deal [[ | + | |Overview= |
| + | * Skeletal Archers are a unique defense that can defend two lanes at once. Archers deal [[Physical]] damage to a single target with high attack range. | ||
| + | * Archers can cover a combined area of 360°, despite what is shown by the in-game range indicator. | ||
| + | * Generally when placing archers as a main DPS you'd want to have them both face the front of the lane so the mobs are in the sight of each archer. | ||
| + | * Skeletal Archers has a really useful shard named "Double Tap" that has a 45% (51% gilded) chance to attack again in succession. | ||
|Description=Tied together for eternity, these archers have both angles covered. | |Description=Tied together for eternity, these archers have both angles covered. | ||
|Icon=AbyssLord_BoneArchers.png | |Icon=AbyssLord_BoneArchers.png | ||
|Attack=Attack Damage | |Attack=Attack Damage | ||
| − | |A1= | + | |A1=15.00<noinclude>x</noinclude> |
| − | |A2= | + | |A2=18.75<noinclude>x</noinclude> |
| − | |A3= | + | |A3=22.50<noinclude>x</noinclude> |
| − | |A4= | + | |A4=26.25<noinclude>x</noinclude> |
| − | |A5= | + | |A5=30.00<noinclude>x</noinclude> |
| − | + | | | |
| − | |||
| − | |||
| − | |||
| − | | | ||
| − | |||
|Health=Max Health | |Health=Max Health | ||
| − | |H1=20<noinclude>x</noinclude> | + | |H1=20,00<noinclude>x</noinclude> |
| − | |H2=23<noinclude>x</noinclude> | + | |H2=23.00<noinclude>x</noinclude> |
| − | |H3=26<noinclude>x</noinclude> | + | |H3=26.00<noinclude>x</noinclude> |
| − | |H4=29<noinclude>x</noinclude> | + | |H4=29.00<noinclude>x</noinclude> |
| − | |H5=32<noinclude>x</noinclude> | + | |H5=32.00<noinclude>x</noinclude> |
|Level=8 | |Level=8 | ||
|Mana=40 | |Mana=40 | ||
| − | + | |Element=[[Physical]] | |
| − | |Element=[[ | ||
|ISpeed=3<noinclude>s</noinclude> | |ISpeed=3<noinclude>s</noinclude> | ||
}} | }} | ||
Latest revision as of 20:18, 14 November 2023
| Skeletal Archer | ||||||||||||

| ||||||||||||
| Tied together for eternity, these archers have both angles covered. | ||||||||||||
| Defense Statistics | ||||||||||||
|
- Skeletal Archers are a unique defense that can defend two lanes at once. Archers deal Physical damage to a single target with high attack range.
- Archers can cover a combined area of 360°, despite what is shown by the in-game range indicator.
- Generally when placing archers as a main DPS you'd want to have them both face the front of the lane so the mobs are in the sight of each archer.
- Skeletal Archers has a really useful shard named "Double Tap" that has a 45% (51% gilded) chance to attack again in succession.
| Attribute | Tier One | Tier Two | Tier Three | Tier Four | Tier Five |
|---|---|---|---|---|---|
| Attack Damage Defense Power (x) |
15.00x | 18.75x | 22.50x | 26.25x | 30.00x |
| Max Health Defense Health (x) |
20,00x | 23.00x | 26.00x | 29.00x | 32.00x |