Difference between revisions of "Maps"
From Dungeon Defenders 2 Wiki
m (Updated Content) |
(→Dragonfall Castle) |
||
| (99 intermediate revisions by 25 users not shown) | |||
| Line 1: | Line 1: | ||
| − | == | + | Dungeon Defenders II is set in the fictional world of Etheria, specifically within the Kingdom of Dragonfall. Starting from The Private [[Tavern]] or in The Heroes [[Marketplace]] - the outdoor HUB, players will be able to head into various locations broken down into playable maps to explore and defend by accessing the Wartable. |
| − | + | ||
| − | === | + | == What does a map contain == |
| − | + | ||
| − | === | + | Each map is an instance laid out like an arena containing lanes leading to objectives which will be required to defend. |
| − | The | + | |
| + | * '''Lanes''' | ||
| + | :This is how most enemies travels within a map. Each lane starts from an enemy spawner and ends where an objective is. While most lanes are separated to a singular path, some lanes will converge creating a chokepoint. There are two types of enemy lanes - a ground lane for most regular enemies and a flyer lane for flying-type enemies. | ||
| + | |||
| + | * '''Objectives''' | ||
| + | :Objectives are the main thing to defend in every map of Dungeon Defenders 2. Each core has a specific amount of health, so they can be damaged by enemies. There are two types of objectives - the main core (game over when destroyed) and a sub-objective (opening new lanes or disabling environmental traps when destroyed). Maps can either contain only main cores or both types of objectives. | ||
| + | |||
| + | * '''Environmental Traps''' | ||
| + | : | ||
| + | |||
| + | ==Maps== | ||
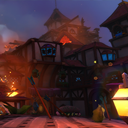
| + | |||
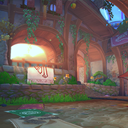
| + | ===Dragonfall Town=== | ||
| + | [[File:Dragonfall_Town_Region_Icon.png|right|100px]] | ||
| + | |||
| + | |||
| + | <gallery widths=100px heights=120px mode="packed"> | ||
| + | File:TheGatesofDragonfall_MapIcon.png|none|link=The Gates of Dragonfall|''[[The Gates of Dragonfall]]'' | ||
| + | File:DragonfallBazaar_MapIcon.png|left|link=Dragonfall Bazaar|''[[Dragonfall Bazaar]]'' | ||
| + | File:GreystonePlaza_MapIcon.png|link=Greystone Plaza|''[[Greystone Plaza]]'' | ||
| + | File:LittleHornValley_MapIcon.png|link=Little-Horn Valley|''[[Little-Horn Valley]]'' | ||
| + | </gallery> | ||
| + | |||
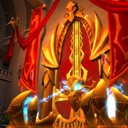
| + | ===Dragonfall Castle=== | ||
| + | [[File:Dragonfall_Castle_Region_Icon.png|right|100px]] | ||
| + | |||
| + | |||
| + | <gallery widths=100px heights=120px mode="packed"> | ||
| + | File:TheRamparts_MapIcon.png|link=The Ramparts|''[[The Ramparts]]'' | ||
| + | File:TheThroneRoom_MapIcon.png|link=The Throne Room|''[[The Throne Room]]'' | ||
| + | File:RampartsSiege_MapIcon.png|link=Ramparts Siege|''[[Ramparts Siege]]'' | ||
| + | File:AssaultOnThroneRoom_MapIcon.png|link=Assault On Throne Room|''[[Assault On Throne Room]]'' | ||
| + | File:Malakai's Sewer MapIcon.png|link=Malakai's Sewer|''[[Malakai's Sewer]]'' | ||
| + | File:Malakai's Manor MapIcon.png|link=Malakai's Manor|''[[Malakai's Manor]]'' | ||
| + | </gallery> | ||
| + | |||
| + | ===The Liferoot=== | ||
| + | [[File:The_Liferoot_Region_Icon.png|right|100px]] | ||
| + | |||
| + | |||
| + | <gallery widths=100px heights=120px mode="packed"> | ||
| + | File:ForestCrossroads_MapIcon.png|link=Forest Crossroads|''[[Forest Crossroads]]'' | ||
| + | File:LiferootForest_MapIcon.png|link=Liferoot Forest|''[[Liferoot Forest]]'' | ||
| + | File:Forest_Biome_IconLowRes.png|link=Forest Biome|''[[Forest Biome]]'' | ||
| + | </gallery> | ||
| + | |||
| + | ===Ancient Ruins=== | ||
| + | [[File:Ancient_Ruins_Region_Icon.png|right|100px]] | ||
| + | |||
| + | |||
| + | <gallery widths=100px heights=120px mode="packed"> | ||
| + | File:ForgottenRuins_MapIcon.png|link=Forgotten Ruins|''[[Forgotten Ruins]]'' | ||
| + | File:NimbusReach_MapIcon.png|link=Nimbus Reach|''[[Nimbus Reach]]'' | ||
| + | </gallery> | ||
| + | |||
| + | ===Rotting Ravine=== | ||
| + | [[File:Rotting_Ravine_Region_Icon.png|right|100px]] | ||
| + | |||
| + | |||
| + | <gallery widths=100px heights=120px mode="packed"> | ||
| + | File:SiphonSiteD_MapIcon.png|link=Siphon Site D|''[[Siphon Site D]]'' | ||
| + | File:DragonfallSewers_MapIcon.png|link=Dragonfall Sewers|''[[Dragonfall Sewers]]'' | ||
| + | File:TheDeadRoad_MapIcon.png|link=The Dead Road|''[[The Dead Road]]'' | ||
| + | File:TempleOfTheNecrotic_MapIcon.png|link=Temple Of The Necrotic|''[[Temple Of The Necrotic]]'' | ||
| + | </gallery> | ||
| + | |||
| + | ===Lost Dungeons=== | ||
| + | [[File:Lost_Dungeons_Region_Icon.png|right|100px]] | ||
| + | |||
| + | |||
| + | <gallery widths=100px heights=120px mode="packed"> | ||
| + | File:UnholyCatacombs_MapIcon.png|link=Unholy Catacombs|''[[Unholy Catacombs]]'' | ||
| + | File:BuriedBastille_MapIcon.png|link=Buried Bastille|''[[Buried Bastille]]'' | ||
| + | File:MoltenCitadel_MapIcon.png|link=Molten Citadel|''[[Molten Citadel]]'' | ||
| + | File:Crumbled_Bulwark_IconLowRes.png|link=Crumbled Bulwark|''[[Crumbled Bulwark]]'' | ||
| + | File:Embermount_Volcano_IconLowRes.png|link=Embermount Volcano|''[[Embermount Volcano]]'' | ||
| + | </gallery> | ||
| + | |||
| + | ===The High Seas=== | ||
| + | [[File:The_High_Seas_Region_Icon.png|right|100px]] | ||
| + | |||
| + | |||
| + | <gallery widths=100px heights=120px mode="packed"> | ||
| + | File:The_Jacked_Sparrow_Icon.png|link=The Jacked Sparrow|''[[The Jacked Sparrow]]'' | ||
| + | File:Plunderer%27s_Paradise_IconLowRes.png|link=Plunderer's Paradise|''[[Plunderer's Paradise]]'' | ||
| + | </gallery> | ||
| + | |||
| + | ===Drakenfrost=== | ||
| + | [[File:Drakenfrost_Region_Icon.png|right|100px]] | ||
| + | |||
| + | |||
| + | <gallery widths=100px heights=120px mode="packed"> | ||
| + | File:Drakenfrost_Resort_Icon.png|link=Drakenfrost Resort|''[[Drakenfrost Resort]]'' | ||
| + | File:Drakenfrost_Keep_IconLowRes.png|link=Drakenfrost Keep|''[[Drakenfrost Keep]]'' | ||
| + | </gallery> | ||
| + | |||
| + | ===The Wild West=== | ||
| + | [[File:The_Wild_West_Region_Icon.png|right|100px]] | ||
| + | |||
| + | |||
| + | <gallery widths=100px heights=120px mode="packed"> | ||
| + | File:Wildest_West_IconLowRes.png|link=Wildest West|''[[Wildest West]]'' | ||
| + | File:Wild_Westival_Icon.png|link=Wild Westival|''[[Wild Westival]]'' | ||
| + | </gallery> | ||
| + | |||
| + | ===Tornado Valley=== | ||
| + | [[File:Tornado_Valley_Region_Icon.png|right|100px]] | ||
| + | |||
| + | |||
| + | <gallery widths=100px heights=120px mode="packed"> | ||
| + | File:Tornado_Canyons_IconLowRes.png|link=Tornado Canyons|''[[Tornado Canyon]]'' | ||
| + | File:Tornado_Highlands_IconLowRes.png|link=Tornado Highlands|''[[Tornado Highlands]]'' | ||
| + | </gallery> | ||
| + | |||
| + | ===Hidden Caverns=== | ||
| + | [[File:Hidden_Caverns_Region_Icon.png|right|100px]] | ||
| + | |||
| + | |||
| + | <gallery widths=100px heights=120px mode="packed"> | ||
| + | File:Crystal Mine Icon.png|link=Crystal Mine|''[[Crystal Mine]]'' | ||
| + | File:Lava Caverns Icon.png|link=Lava Caverns|''[[Lava Caverns]]'' | ||
| + | </gallery> | ||
| + | |||
| + | ===Others=== | ||
| + | ''These maps are available only in very specific gamemodes unlike most common maps.'' | ||
| + | <gallery widths=100px heights=120px mode="packed"> | ||
| + | File:TheWyvernDen_MapIcon.png|link=The Wyvern Den|''[[The Wyvern Den]]'' | ||
| + | File:HarbingersWarship_MapIcon.png|link=Harbinger's Warship|''[[Harbinger's Warship]]'' | ||
| + | File:TheLostTemple_MapIcon.png|link=The Lost Temple|''[[The Lost Temple]]'' | ||
| + | </gallery> | ||
[[Category:Dungeon Defenders 2]] | [[Category:Dungeon Defenders 2]] | ||
Latest revision as of 01:09, 14 December 2023
Dungeon Defenders II is set in the fictional world of Etheria, specifically within the Kingdom of Dragonfall. Starting from The Private Tavern or in The Heroes Marketplace - the outdoor HUB, players will be able to head into various locations broken down into playable maps to explore and defend by accessing the Wartable.
Contents
What does a map contain
Each map is an instance laid out like an arena containing lanes leading to objectives which will be required to defend.
- Lanes
- This is how most enemies travels within a map. Each lane starts from an enemy spawner and ends where an objective is. While most lanes are separated to a singular path, some lanes will converge creating a chokepoint. There are two types of enemy lanes - a ground lane for most regular enemies and a flyer lane for flying-type enemies.
- Objectives
- Objectives are the main thing to defend in every map of Dungeon Defenders 2. Each core has a specific amount of health, so they can be damaged by enemies. There are two types of objectives - the main core (game over when destroyed) and a sub-objective (opening new lanes or disabling environmental traps when destroyed). Maps can either contain only main cores or both types of objectives.
- Environmental Traps
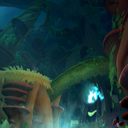
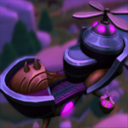
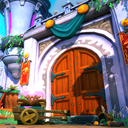
Maps
Dragonfall Town
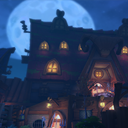
Dragonfall Castle

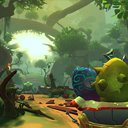
The Liferoot


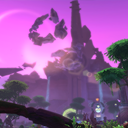
Ancient Ruins
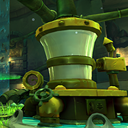
Rotting Ravine
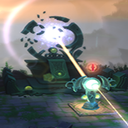
Lost Dungeons
The High Seas

Drakenfrost
The Wild West
Tornado Valley
Hidden Caverns
Others
These maps are available only in very specific gamemodes unlike most common maps.