Difference between revisions of "Incursions"
m (→Chaos V Incursions) |
m (→Chaos IV Incursions) |
||
| Line 261: | Line 261: | ||
* '''<u>Victory Condition</u>''' - No cores are destroyed and all enemies are defeated on the last wave. | * '''<u>Victory Condition</u>''' - No cores are destroyed and all enemies are defeated on the last wave. | ||
| − | * '''<u>Special Weapon Reward | + | * '''<u>Special Weapon Reward</u>''' - [[File:ScreenShot00777.png|25px]] '''[[Scorched Tome of Molten Brimstone]]''' ''(Chance from Victory Chest)'' |
{| class="wikitable" style="width:100%;" | {| class="wikitable" style="width:100%;" | ||
| Line 293: | Line 293: | ||
* '''<u>Victory Condition</u>''' - No cores are destroyed and the Demon Lord boss is defeated on the last wave. | * '''<u>Victory Condition</u>''' - No cores are destroyed and the Demon Lord boss is defeated on the last wave. | ||
| − | * '''<u>Special Weapon Reward | + | * '''<u>Special Weapon Reward</u>''' - [[File:Bone_Glove_Icon.png|25px]] '''[[Bone Glove]]''' ''(Chance from Victory Chest)'' |
{| class="wikitable" style="width:100%;" | {| class="wikitable" style="width:100%;" | ||
Revision as of 16:02, 18 January 2023
Incursions are maps that can be played after a Chaos Trials map has been completed. Upon completing a Chaos tier for the first time (Chaos 1-7), one or two incursions are unlocked for that Chaos tier. Each map has unique playing conditions that are found only on that map, and in Incursion mode. Minibosses will drop less gear upon defeat, but and will drop more than normal amounts of pet consumables and eggs. On all incursion maps, the 'Replay from Wave' function is disabled.
Upon completing the incursion you permanently unlock a special weapon, which can be purchased from the Wayfarer for 500 Defender Medals. Most special weapons have a chance to drop in the victory chest on the Incursion map that unlocked it, each time it is played. Each special weapon is a legendary drop, for the Chaos level it is earned on. Each one will have the first MOD slot locked with a special MOD that only comes on that weapon, and cannot be moved off of it or replaced. The special MOD can be rerolled though. They will also come with a second MOD that is normal and can be moved, replaced or rerolled.
On some incursion maps, the enemies in a lane and the miniboss will randomly be assigned mutators from the following pool of six possible choices: 1) Speedy, +15% movement speed; 2) Trollblood, +3% HP regen every 5 sec; 3) Tenacious, +35% crowd control resilience; 4) Healthy, +15% health; 5) Grounded, cannot be knocked up; 6) Mighty, +15% attack damage.
Contents
Chaos I Incursions
Chrome Enemies
Map - Forgotten Ruins (Ancient Ruins).
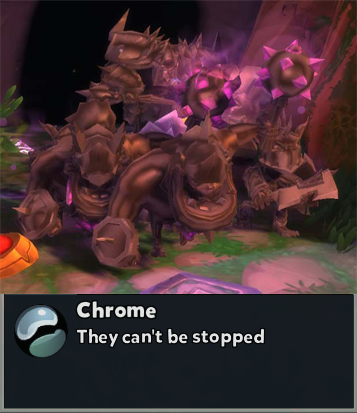
Playing Condition - 5 waves; all lanes have the 'Chrome' mutator "cannot be stopped"; no other lane mutators are applied; ground and air lane enemies and minibosses are similar to Chaos 1 Expedition.
Victory Condition - No cores are destroyed and all enemies are defeated on the last wave.
Special Weapon Reward - ![]() Terra Blade (Light sword for Squire/Dryad/Barbarian). All Terra Blades are usable by all sword wielding heroes regardless of the description. This special weapon can drop twice from a victory chest.
Terra Blade (Light sword for Squire/Dryad/Barbarian). All Terra Blades are usable by all sword wielding heroes regardless of the description. This special weapon can drop twice from a victory chest.
- Special Weapon MOD - Terra Wisp, "fire a wisp that deals XX-XX% Hero Damage. It pierces up to X-X enemies and fires once per a second." Chaos 1 values [17.7-38%, 2-5 enemies], Chaos 7 values [59.7-80%, 8-11 enemies]. The wisp is a short projectile that fires out at chest level horizontally on melee swings. This attack pierces, but that does not include Chaos enemy's defenses such as Geode or Vanguard shields.
|
Playing Tips (WARNING - SPOILERS): Chaos One enemies have hefty defenses against projectile attacks, so unless you have Piercing MODs on your Relics, try using AOE based attacks such as auras, traps, and nodes. Barricades on each lane are highly recommended while your AOE defenses whittle down their HP.
The Chrome mutator means that no crowd control effects will work. This includes stun, freeze, and slow. There is no need to use any crowd control abilities on this stage, as they will not work here. If crowd control attacks are used, the animations will still be applied (e.g. frozen enemies are encased in ice) but it will have no effect on the enemy movement. All spawned enemies will also have a silver-ish chromed look. Summoned enemies (i.e. Dark Mage skeletons) will not have chrome skin, but the Chrome mutator is still applied. |
Griblok's Horde
Map - The Gates of Dragonfall (Dragonfall Town).
Playing Condition - 5 waves; one lane will be designated as the Griblok Horde lane each wave; each lane has one mutator from the common pool of mutators; ground and air lane enemies and minibosses are similar to Chaos 1 Expedition.
Victory Condition - No cores are destroyed and all enemies are defeated on the last wave.
Special Weapon Reward - ![]() Lunar Portal (staff for Apprentice/Adept). Staff has 4 spread, 3 speed, and "diamondshot" which is in the shape of a tight square pattern turned 45 degrees. This special weapon can drop from a victory chest.
Lunar Portal (staff for Apprentice/Adept). Staff has 4 spread, 3 speed, and "diamondshot" which is in the shape of a tight square pattern turned 45 degrees. This special weapon can drop from a victory chest.
- Special Weapon MOD - Lunar Caller, "secondary attacks summon Lunar Portals that deal XX% Ability Power as magical damage per second for XX seconds. Up to X portals." Chaos 1 values [56-155%, 9.65-17.5s, 1-6 portals], Chaos 7 values [116-215%, 18.65-33.5s, 4-9 portals]. The portal is a stationary star with wide range that you place with the secondary fire button. It then fires a single continuous beam out from it, attacking a singular enemy until that enemy dies. Each portal can only attack one separate enemy at a time, and they do not stack attacks.
|
Playing Tips (WARNING - SPOILERS): Chaos One enemies have hefty defenses against projectile attacks, so unless you have Piercing MODs on your Relics, try using AOE based attacks such as auras, traps, and nodes. These work especially well on the Horde lane as enemies are packed so closely together. Keep in mind that the Horde lane moves, so don't overbuild on only one lane. Barricades on each lane are highly recommended while your AOE defenses whittle down their HP, but place them back as far as you can.
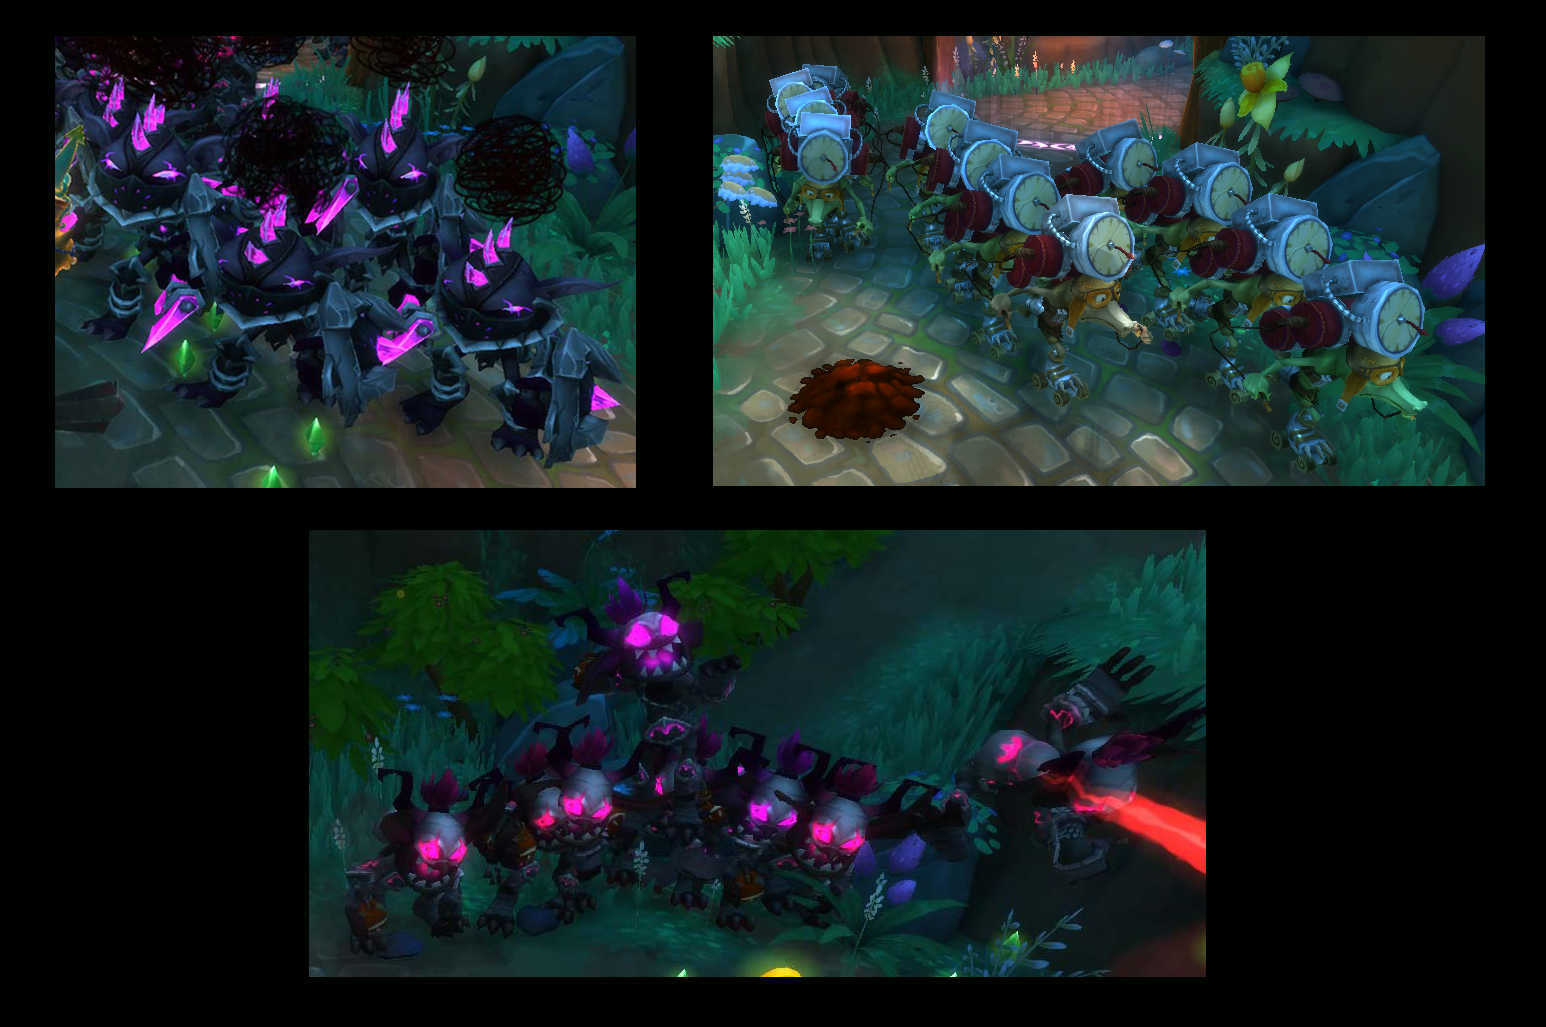
Each wave one of the three ground lanes will be designated as the Griblok's Horde lane, and will blink red on the schedule. This is assigned at random, and may change lanes each wave. The Horde lane will consist of large numbers of three enemy types - Kobolds (Tier 2 - skate version), mini versions of Quibly, and mini versions of Griblok. This map has no air lanes on any waves. The Horde comes in groups of tight packs with Kobolds in front, mini-Gribloks next, and followed by mini-Quiblys. Enemy types in each group typically number from 3-12 of each class, with about 15-20 total in each group. Groups are separated by small packs of 3-6 mini-Quiblys. The Horde lane will last longer than the other two lanes with larger numbers and spread out groups. On wave 5, the Horde lane will change to 39 Kobolds and 140 mini-Quiblys. Griblok may also spawn as a large miniboss named Griblok the Razor on any red schedule lane, on any wave, and can spawn on more than one lane on a single wave. Wave 5 can have zero miniboss spawns. |
Chaos II Incursions
Wyvern Enthusiast
Map - Forest Crossroads (The Liferoot).
Playing Condition - 5 waves; air lanes have greatly increased numbers and enemy types; a 3rd air lane is added; several Ogre minibosses spawn on the final wave; each lane has one mutator from the common pool of mutators ground and air lane enemies and minibosses are similar to Chaos 2 Expedition.
Victory Condition - No cores are destroyed and all enemies are defeated on the last wave.
Special Weapon Reward - ![]() North Pole (light polearm for Monk/Initiate). It has 1 spread and 2 speed. This special weapon can not drop from a victory chest.
North Pole (light polearm for Monk/Initiate). It has 1 spread and 2 speed. This special weapon can not drop from a victory chest.
- Special Weapon MOD - Pole Launcher, "Secondary Attacks fire additional North Poles that deal XXX-XXX% Hero Damage as Frost Damage, pierce 2 enemies and slows them by 40% for X-XX seconds". Chaos 2 values [?-?, ?-?], Chaos 7 values [303-390%, 8.1-11s]. This attack fires in an upwards arc path and has a short range. You must aim high or jump to increase its range to hit enemies further away. Attacks hit with Frost, so they have a chance to chill the enemy on contact.
|
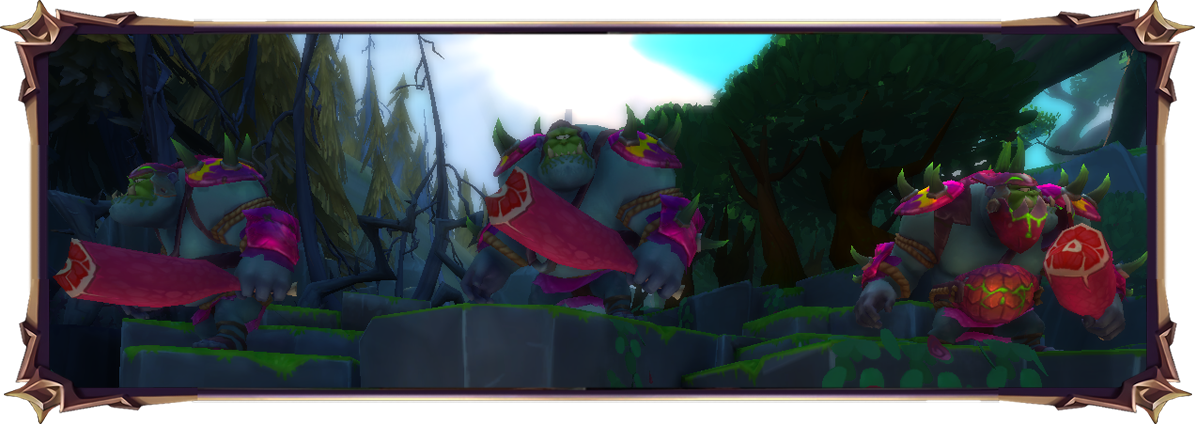
Playing Tips (WARNING - SPOILERS): The key to this map is to counter Cyborks in each lane and having plenty of air defenses against the large amount of fliers that will come from 3 directions. A 3rd air lane is added on the north end of the map (Birch Path - above Ruin Cave lane). Each air lane has up to three different types of enemies (Wyverns, Flying Kobolds, and Lightning Bugs). Cyborks will target auras, nodes, and traps but do not target towers. The more range your towers have, the better. Air lanes will number from 30-50 in each lane as waves progress, and typically all spawn late in the wave. On Wave 4, one air lane will drop to only 12 enemies, and on Wave 5 all three drop to only 12. This means you can readjust your air defenses on the last waves, and possibly move some towers into position to help with minibosses instead. File:Wyvern Enthusiasts.png From left to right - Timothy, Wyvern Fan , Jimothy, Wyvern Enthusiast and Gregory, Wyvern Aficionado. On Wave 5, three Ogres with unique armor flairs will spawn as minibosses. You can see where and in what order the ogres will spawn on the lane schedules, as the first type Ogre (Timothy, Wyvern Fan) spawns first, and second type (Jimothy, Wyvern Enthusiast) second, and the third (Gregory, Wyvern Aficionado) spawns last. The Ogre spawns are delayed to be spread out. No Ogres will come from the Middle West spawn point (Spooky Woods lane). The only additional miniboss that spawns is Thorc. He can spawn on multiple waves, and more than one lane at a time, but his spawn rate is low. |
Forest Poachers
Map - Liferoot Forest (The Liferoot).
Playing Condition - 5 waves; four Poacher minibosses appear throughout the waves; each lane has one mutator from the common pool of mutators; ground and air lane enemies and minibosses are similar to Chaos 2 Expedition.
Victory Condition - No cores are destroyed and all enemies are defeated on the last wave.
Special Weapon Reward - 35px Tsunamic Chlorophyte (bow for Huntress). Has 5 spread, 2 speed, and "Chlorophyte Arrows" which is in the shape of a vertical straight line.
- Special Weapon MOD - Chlorophyte Chip, "fires a column of Chlorophyte Arrows that deal XX% bonus magical earth damage and may reflect off of one surface." Chaos 2 values [14.4-26%], Chaos 7 values [34.4-46%]. All 5 arrows can uniquely reflect off of surfaces, and that does not include enemies and does not pierce. The projectile will apply any crowd control or elemental values of the hero upon contact with the enemy. This attack does not pierce.
|
Playing Tips (WARNING - SPOILERS): The key to this map is to counter Cyborks in each lane and being ready for the minibosses that spawn on Waves 2-5. Cyborks will target auras, nodes, and traps but do not target towers. The more range your towers have, the better. The air lanes have slightly increased numbers and only a single random enemy type as compared to the Expedition version of this map.
File:Forest Poachers.png From left to right - Sammie the Trapper, Statch the Stalker, Steiner the Hunter and Sturgis the Falconer Each wave starting with wave 2, a poacher will appear on a random lane. They do not get separate mutators from the lane they spawn in. When they first spawn, their icon will appear as a purple question mark, until they pass the spawn point. All 4 are enlarged versions of normal enemies with large health amounts and unique skin flairs. The lane they spawn on will blink red, and you can see them on the schedule. Sammie the Trapper spawns on Wave 2 as a Bomb Goblin whose attacks inflict Oiled status. Statch the Stalker spawns on Wave 3 as a Javelin Thrower whose attacks inflict Poisoned status. Steiner the Hunter spawns on Wave 4 as an Orc. Sturgis the Falconer spawns on Wave 5 as a Lady Orc. The only additional miniboss that spawns is Thorc. He can spawn on multiple waves, and more than one lane at a time, but his spawn rate is low. On Wave 4 only, there are no air lanes. |
Chaos III Incursions
Dawn of the Blood Moon
Map - Forest Biome (The Liferoot).
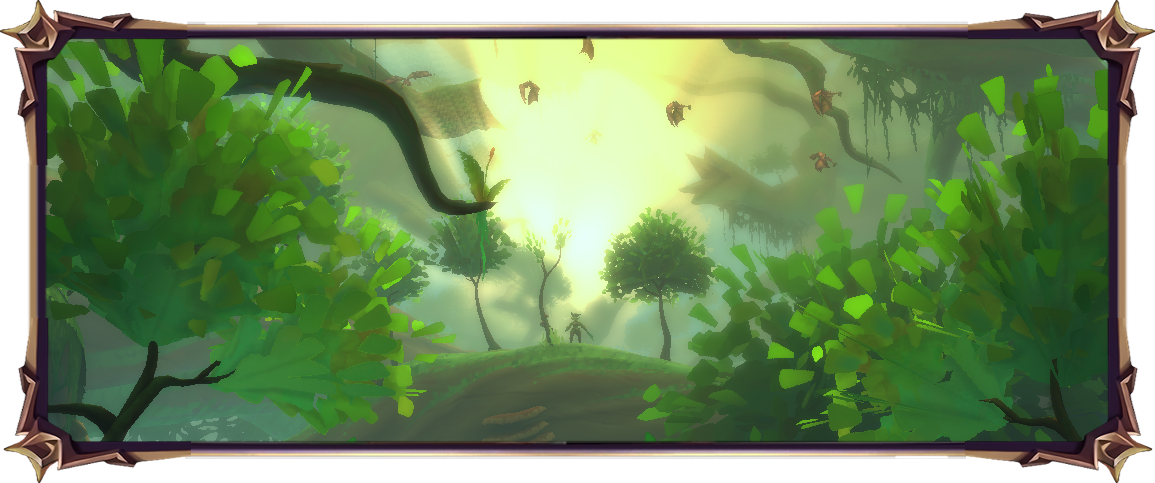
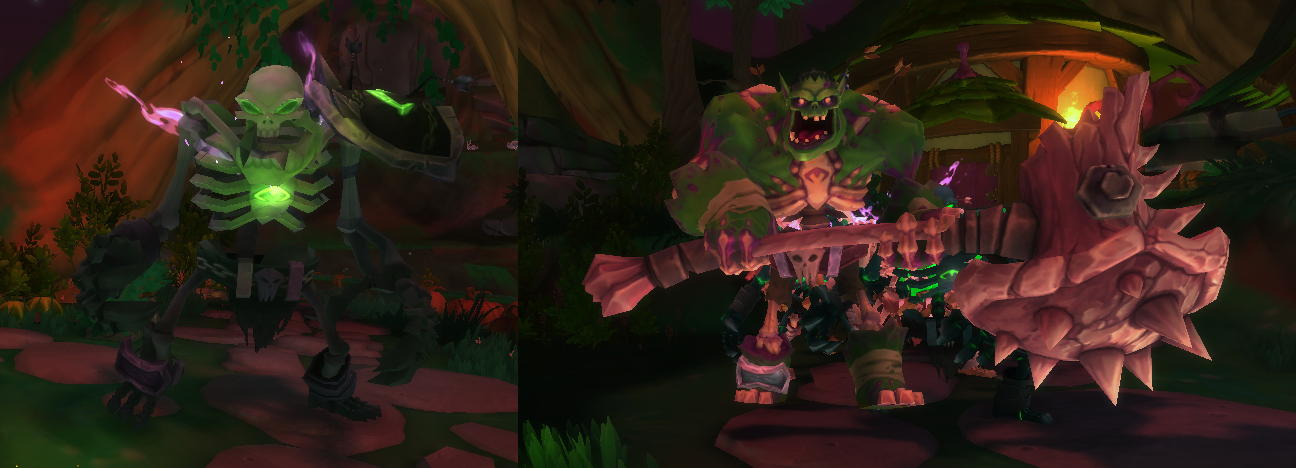
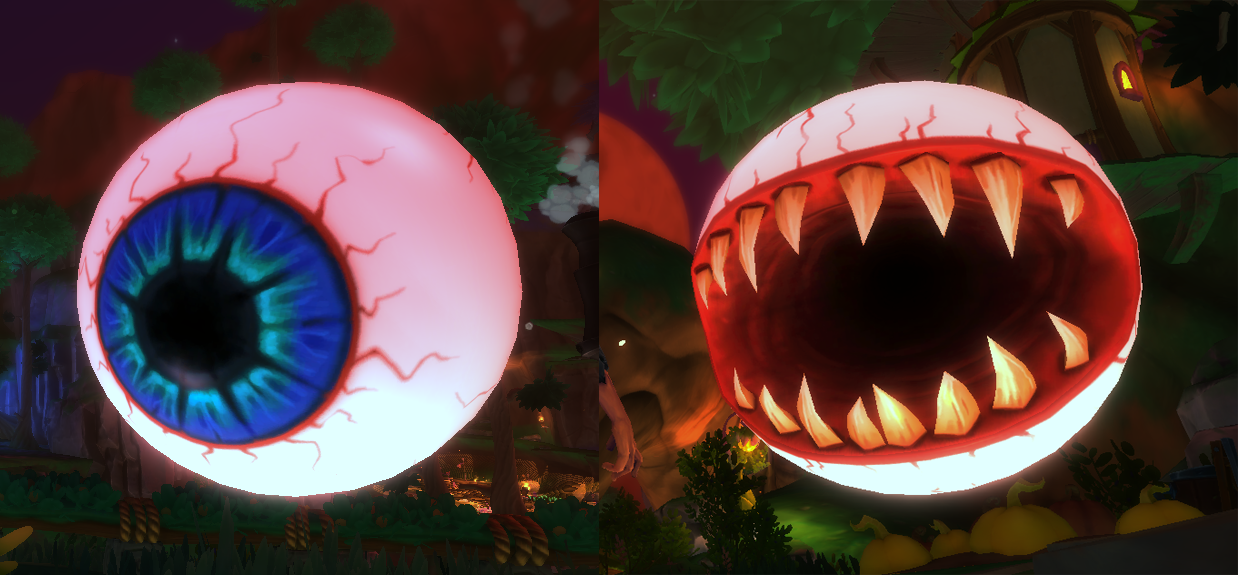
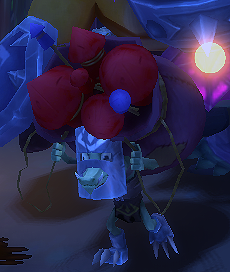
Playing Condition - 5 waves; normal air lanes are removed and replaced with air lanes containing only Demon Eye enemies; 4 additional unmarked lanes added containing Skeletons; Skeleton Hero minibosses spawn from marked lanes throughout the waves; special miniboss Treet spawns during wave 4; special boss Eye of Cthulhu spawns on wave 5; no lane mutators are applied; ground lane enemies and minibosses are similar to Chaos 3 Expedition.
Victory Condition - No cores are destroyed and Eye of Cthulhu is defeated on the last wave.
Special Weapon Reward - ![]() Celebration!!! (canister for Series EV2). It has 2 spread, 2 speed, and fires "Celebration!!!" shots. This special weapon can drop from a victory chest.
Celebration!!! (canister for Series EV2). It has 2 spread, 2 speed, and fires "Celebration!!!" shots. This special weapon can drop from a victory chest.
- Special Weapon MOD - Celebration!!!, "fires two homing projectiles that detonate in a festive explosion dealing 72% Hero Damage as magical damage over a small area." The values are fixed, so it does not matter what level the weapon is or what level the MOD is. The explosion flair is fireworks, and hits for a very limited AOE attack. The projectiles are two homing rockets that fire in separate horizontal arcs, making an oval pattern, with the size of the arc is based on how far away the target you are aiming at when you fire. If it misses, the rocket will spin around the target and attempt to hit it again, and eventually explode. Since the projectiles arc, there is a void spot directly in front of EV2 that it cannot hit at very close range, so this weapon is best used at any distance. The projectile will apply any crowd control or elemental values of the hero upon contact with the enemy.
|
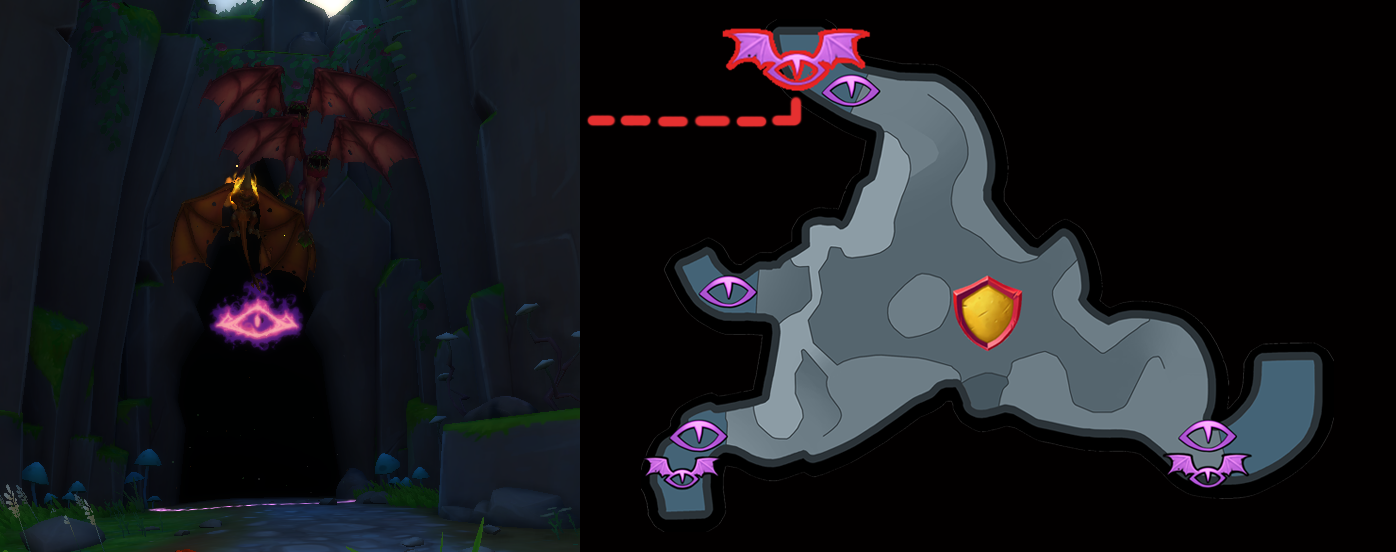
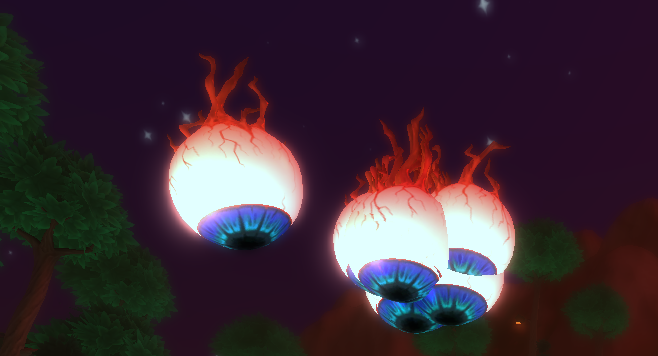
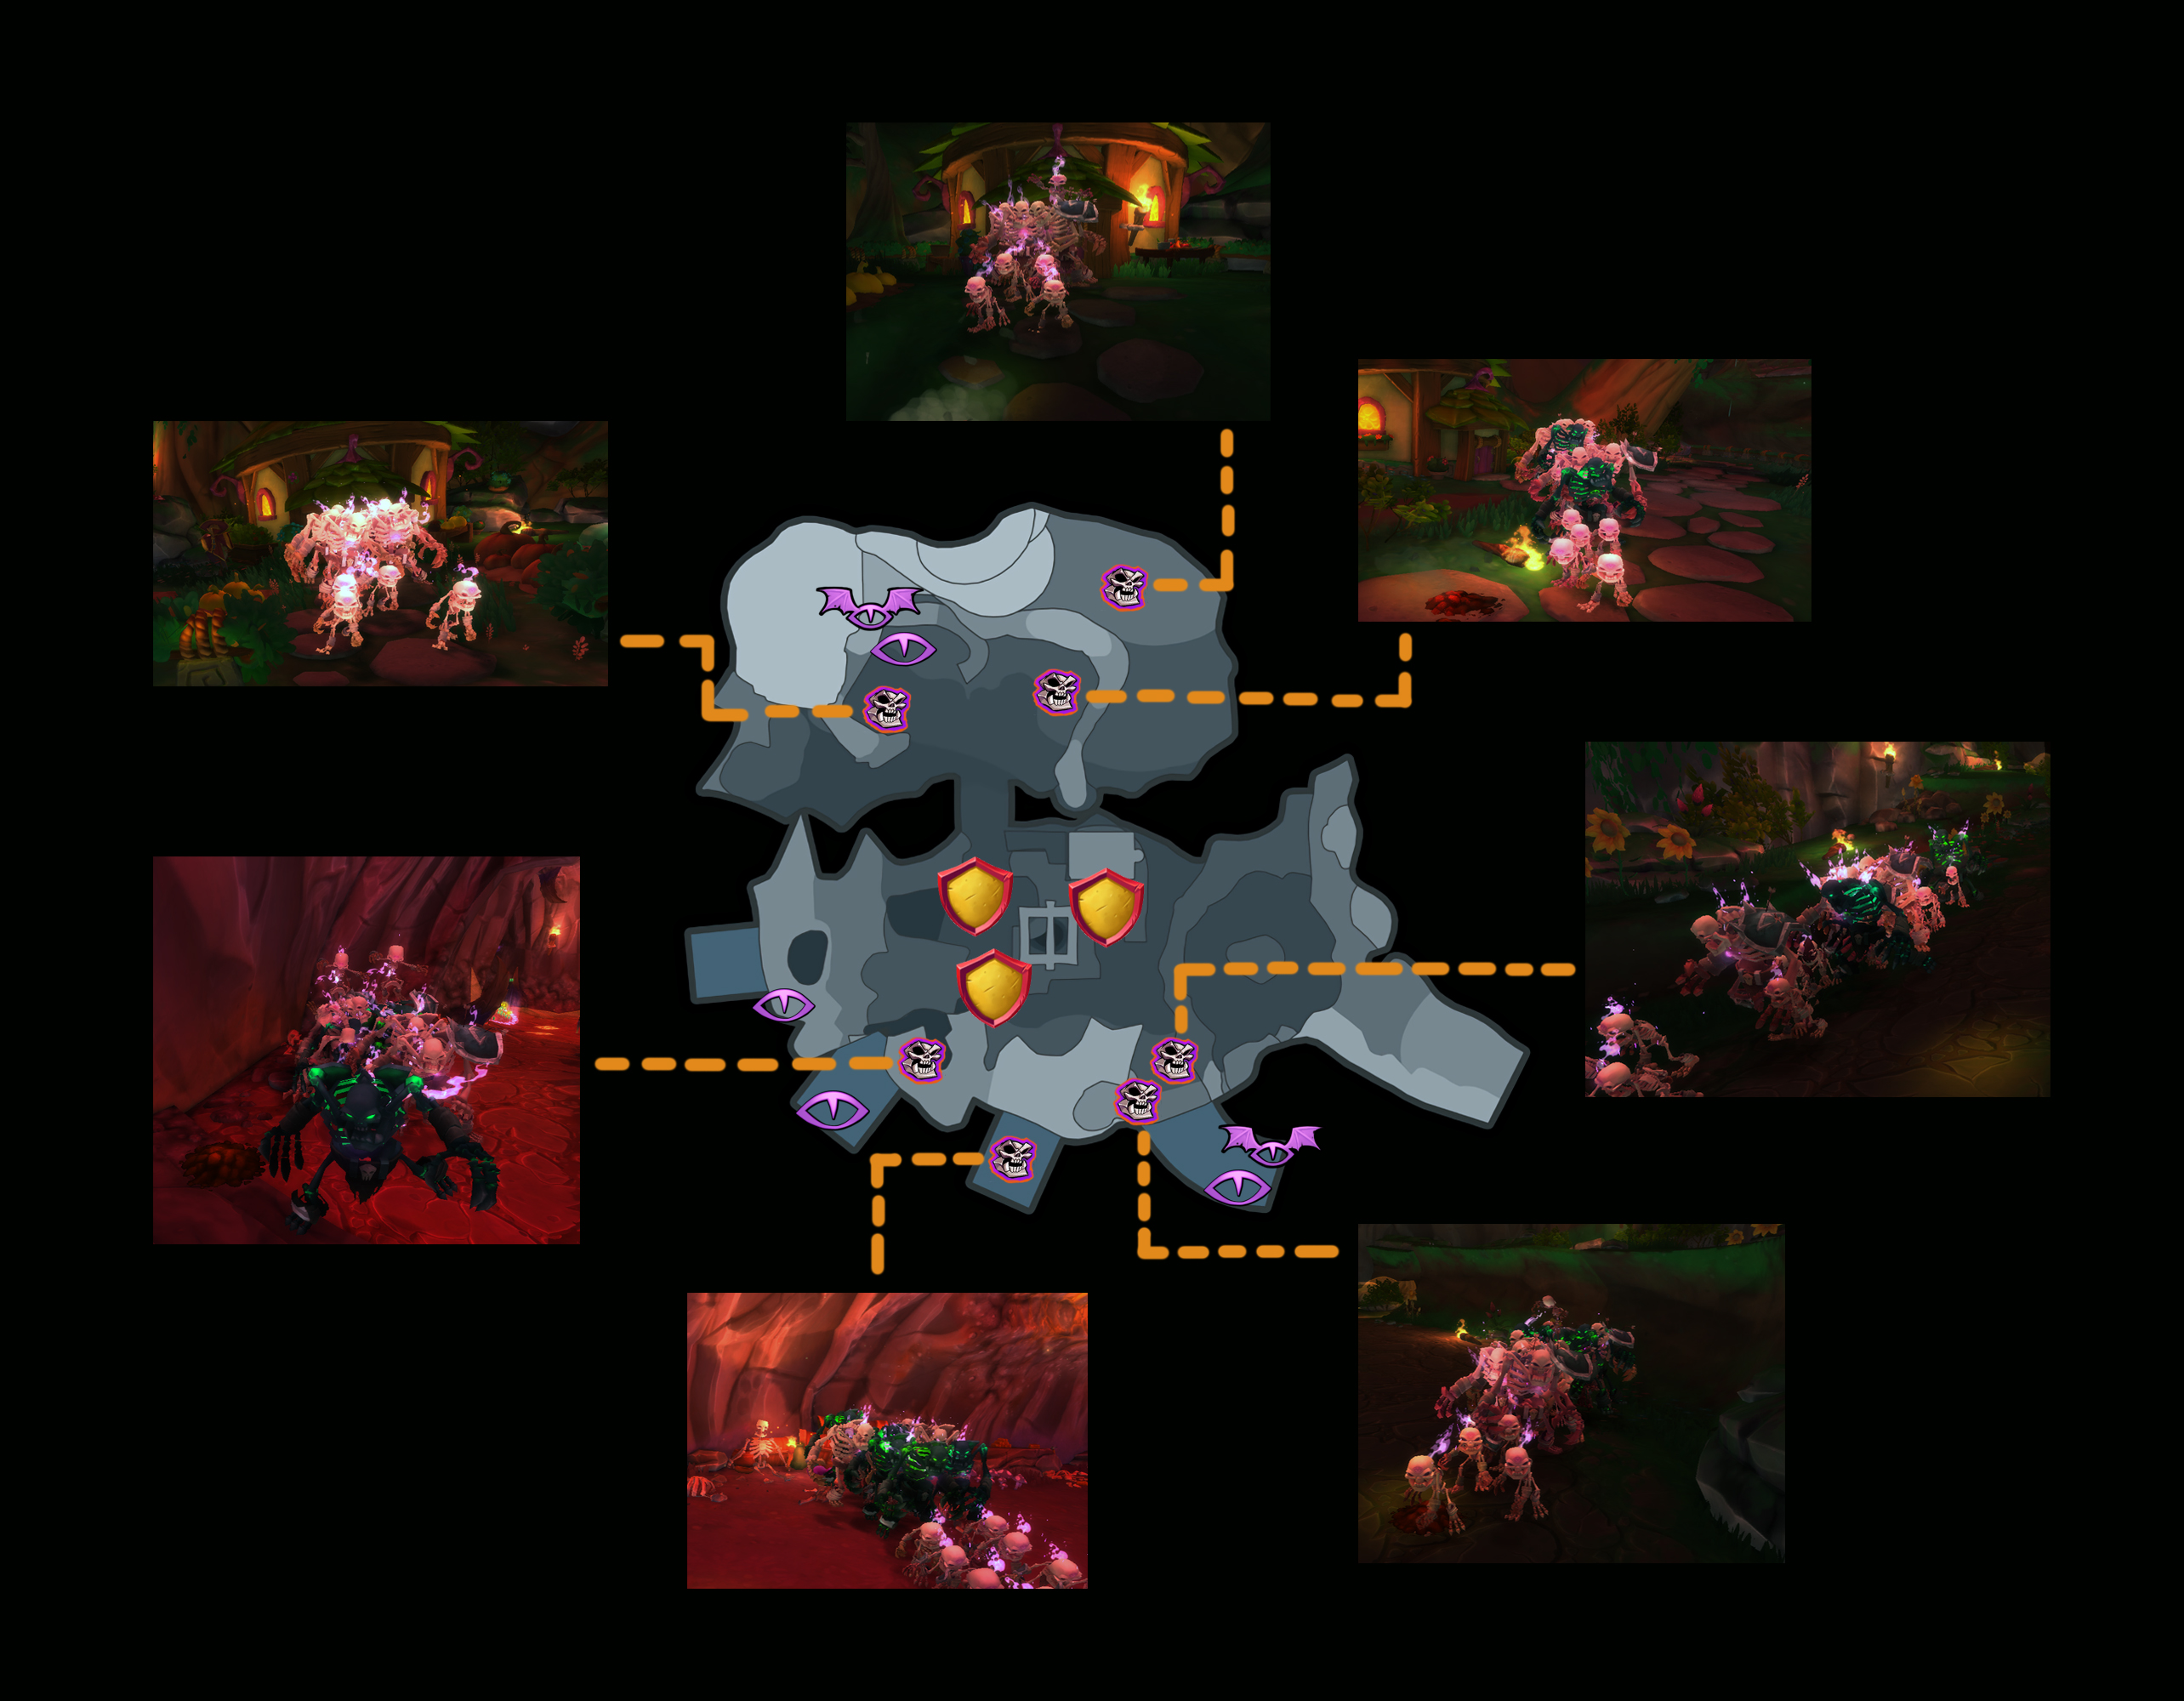
Playing Tips (WARNING - SPOILERS): Chaos Three enemies have hefty defenses against projectile attacks with reflective shields, so unless you have Piercing MODs on your Relics, try using AOE based attacks such as auras, traps, and nodes on normal lanes. All air enemies are Demon Eyes (A unique type of enemies from the world of Teraria.) which are mini eyeballs that tracks and attack only the hero. They do not attack any type of tower or the crystal. Waves 1, 3, and 5 have infinite building timers, however Waves 2 and 4 start automatically after 30 seconds unless you ready-up before then. In order to survive to wave 5, the next two points are something that the players have to be aware of - Secret Skeleton Spawn Points - There are 7 in total, and there is no way to know how many enemies it produces or if any minibosses will spawn from one. A map can be found beside to show the secret spawn points.
If you decide to build in a turtle strategy, then these spawn points might not be a problem. If you're building in a spread out way or even spawn-camping, while there are chokepoints which are very useful, always make sure to allocate some defense to take care of those spawn points that doesn't lead to a chokepoint since they can occasionally be deadly if left unchecked. Minibosses/Special Weapon Drops - Aside from the Geode Prime Miniboss spawning on wave 5 due to this being on Chaos 3 difficulty, there are 6 other types of minibosses that spawns. They can only spawn either at the north or southeast lanes (And also only the north skeleton spawn points too.) No other types will spawn.
Skeleton Heroes Miniboss Weapon Drops: (In the Order of - Skeleton Apprentice, Skeleton Squire, Skeleton Huntress & Skeleton Monk.)
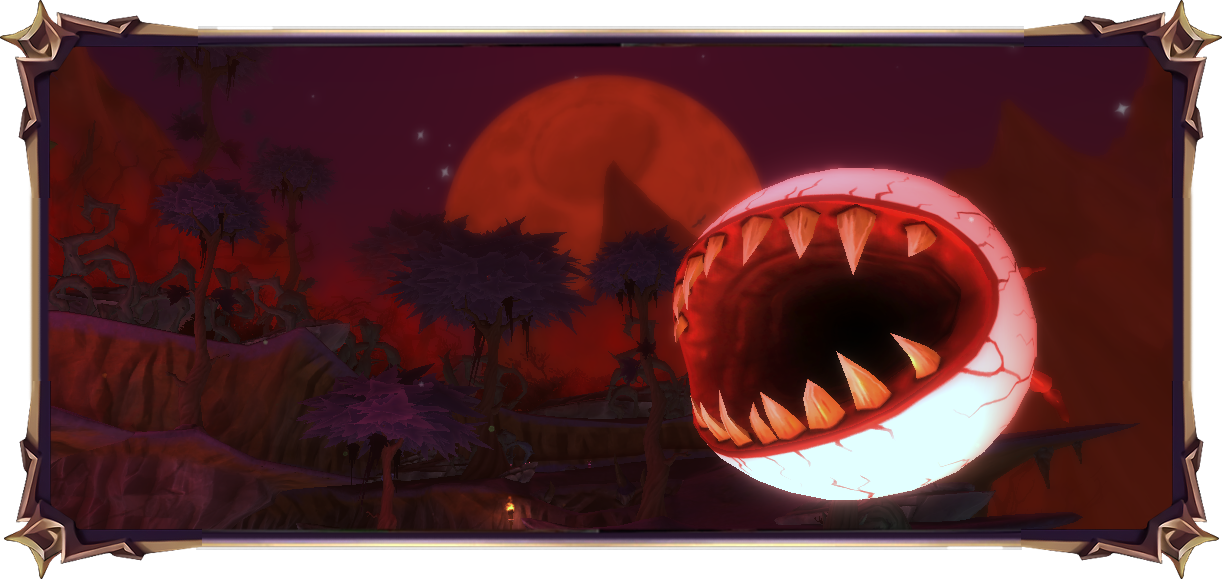
Wave 5 : The Eye of Cthulhu - The final wave is a Boss round and enemies will infinitely spawn until the Boss is defeated, which will then end the stage immediately. The Boss is The Eye of Cthulhu which is a giant eyeball that's also a unique enemy from Terraria alongside Demon Eyes. It spawns randomly from either air spawn point, and it can be seen on the schedule before the wave starts. This boss has two phases -
|
Kobold Bling King
Map - Little-Horn Valley (Dragonfall Town).
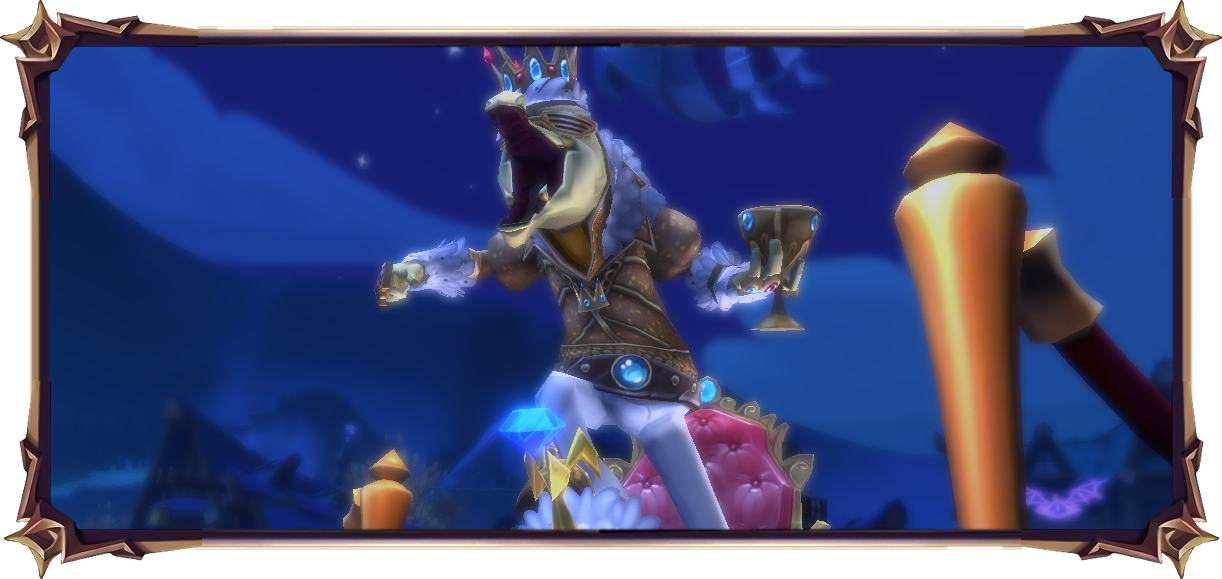
Playing Condition - 5 waves; enemies infinitely spawn until wave is complete; gather gold crystals that drop from golden crystal beasts or spawn randomly around the map and return them to the Kobold King found in the center of the map; each wave has a time limit; each lane has one mutator from the common pool of mutators; ground and air lane enemies and minibosses are similar to Chaos 3 Expedition.
Victory Condition - No cores are destroyed and all gold crystal requirements at met before the timer runs out.
Special Weapon Reward - ![]() Bling King Bow, which shows up in inventory as "Bling-O-Midas" (bow for Huntress). Has 1 spread, 2.5 speed, and Single II type. Primary attacks are lava ball flair that burst on impact, but have no AOE effect and do not Ignite. It is only cosmetic. This special weapon can drop from a victory chest.
Bling King Bow, which shows up in inventory as "Bling-O-Midas" (bow for Huntress). Has 1 spread, 2.5 speed, and Single II type. Primary attacks are lava ball flair that burst on impact, but have no AOE effect and do not Ignite. It is only cosmetic. This special weapon can drop from a victory chest.
- Special Weapon MOD - Bling Blast, "charged shots fire a stream burning enemies for XX% Hero Damage twice per second for X.XX seconds. The stream is XX degrees wide and XXXX units long." Chaos 3 values [45.5-60%, 6.61-8.22s, 40-50 degrees, 1465-1900 units], Chaos 7 values [65.5-80%, 8.83-10.44s, 53-63 degrees, 2065-2500 units]. Hold the charge button down until this fires, and keep the button pressed for it to continue firing the stream for the full time length. Let the button go and hold it again to fire another time. It fires out in a wide, continuous, horizontal fan pattern. This hits with Fire damage, so it will ignite any oiled enemies. This attack also pierces.
|
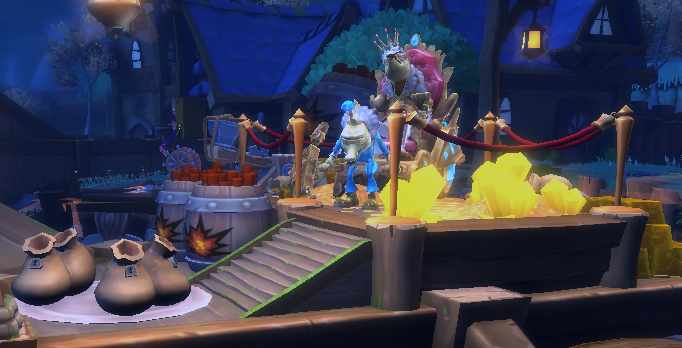
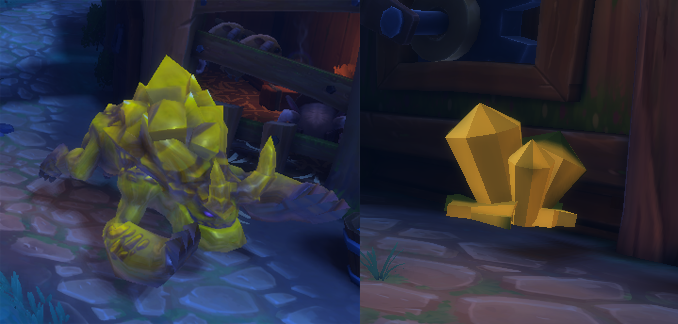
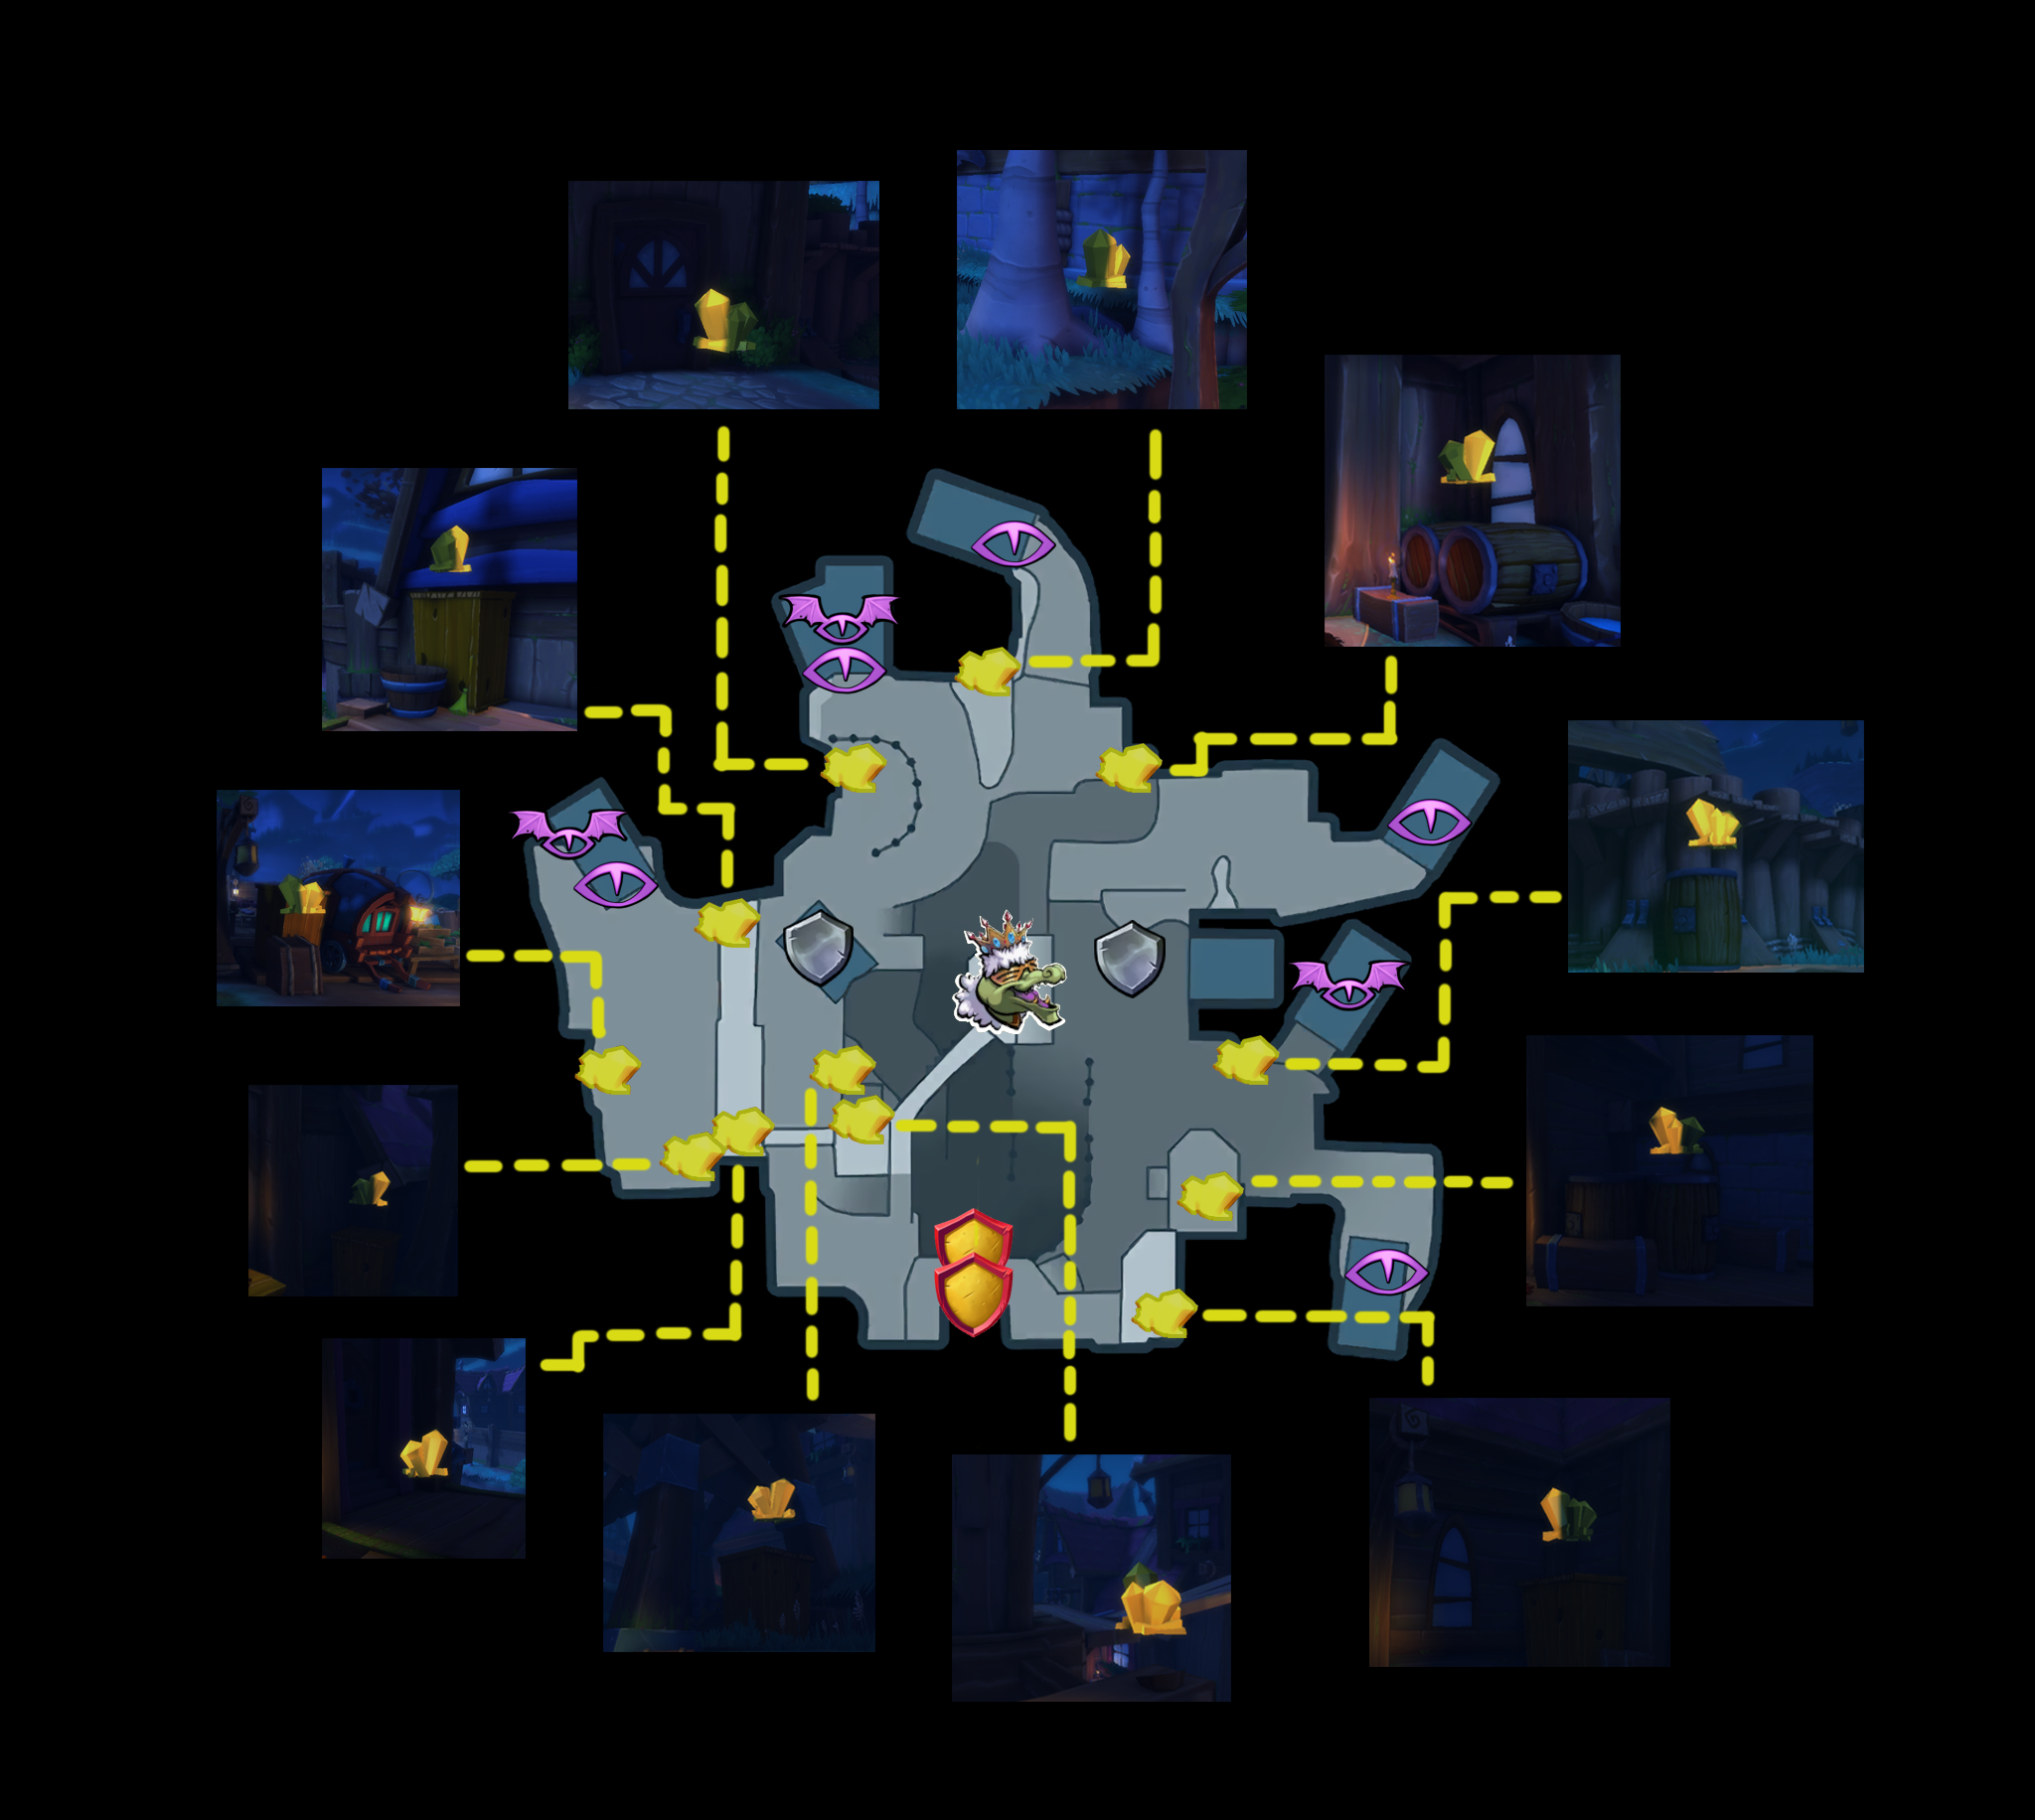
Playing Tips (WARNING - SPOILERS): Chaos Three enemies have hefty defenses against projectile attacks with reflective shields, so unless you have Piercing MODs on your Relics, try using AOE based attacks such as auras, traps, and nodes on ground lanes. There is also a unique enemy called an Explodinator which spawns in certain lanes during certain waves. They are a more powerful version of kobolds which also have the ability to fire rockets everywhere in a medium radius around them. The rockets are very deadly as they could result in a one hit death to a hero. However despite their power, Explodinators are quite tiny, roughly a tad bit smaller than a regular goblin though their presence can be known through rockets firing everywhere from them which are also very visible through sparks flaring from rockets flying and exploding. Gold Nuggets and The Kobold Bling King. Gold is hidden around the stage and it is also dropped from a new miniboss called the Golden Crystal Beast. Once a nugget is given to The Kobold Bling King at a lit up circle near his feet, a small brown gold bag will appear to represent that completed nugget (image above). The map is dark, so the gold nuggets can be hard to see, but they do sparkle. You can only hold 1 gold nugget at a time, and must return it to the Kobold King within 20 seconds, or you will lose that nugget. If you switch heroes or die while you have a nugget, you will lose it. Gold can be found in 12 or so hidden locations on the map (see the map beside), of which about 2-4 are generated at the beginning of the wave at random and a couple more nuggets will generate as the stage progresses. On Wave 5, up to 7 hidden nuggets can randomly spawn as the stage progresses. Gold is also dropped by special minibosses that constantly spawn from lanes called Golden Crystal Beasts (a large gold flair Witherbeast). Each of these minibosses will drop one gold nugget. The dropped nuggets can stack on the ground in the same wave. Once the required amount of nuggets has been given to the Kobold King in a wave, that wave will end. All dropped, held, and hidden gold nuggets will vanish at the end of each wave. Be careful not to place or aim defenses too close to a spawn point so that when the Golden Crystal Beasts drops the nugget, it falls outside of the spawn point and you can reach it. Wave Requirements to clear each wave: Wave 1) 7 nuggets in 245 seconds; Waves 2-4) 9 nuggets in 270 seconds; Wave 5) 10 nuggets in 300 seconds. |
Chaos IV Incursions
Spectral Assault
The Unholy Catacombs is being haunted by Spectral Knights! Cleanse these spirits from the catacombs to keep these crystal safe.
- Map - Unholy Catacombs (Lost Dungeons).
- Playing Condition - 5 waves; purple, red, and green Spectral Knights spawn during waves; each lane has two mutators from the common pool of mutators; ground and air lane enemies and minibosses are similar to Chaos 4 Expedition.
- Victory Condition - No cores are destroyed and all enemies are defeated on the last wave.
- Special Weapon Reward - 25px Scorched Tome of Molten Brimstone (Chance from Victory Chest)
|
Playing Tips for Spectral Assault Chaos Four enemies have hefty defenses against attacks that cause slow, so be sure to adjust your layout to account for the Berserker Orcs that will rush out from the ground lanes. They can be stunned, frozen, and launched into the air though, so those are good tactics to stall them. Well placed barricades will also help to keep them from the crystal.
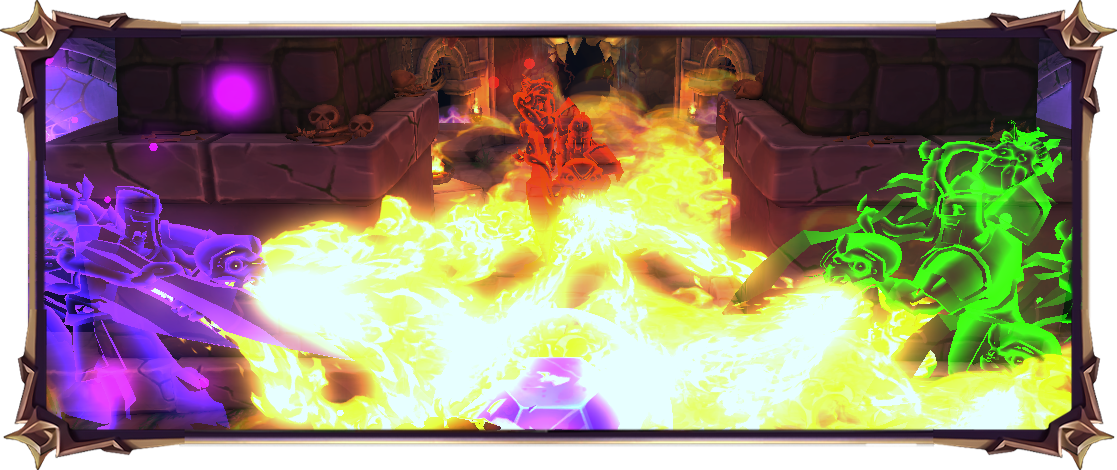
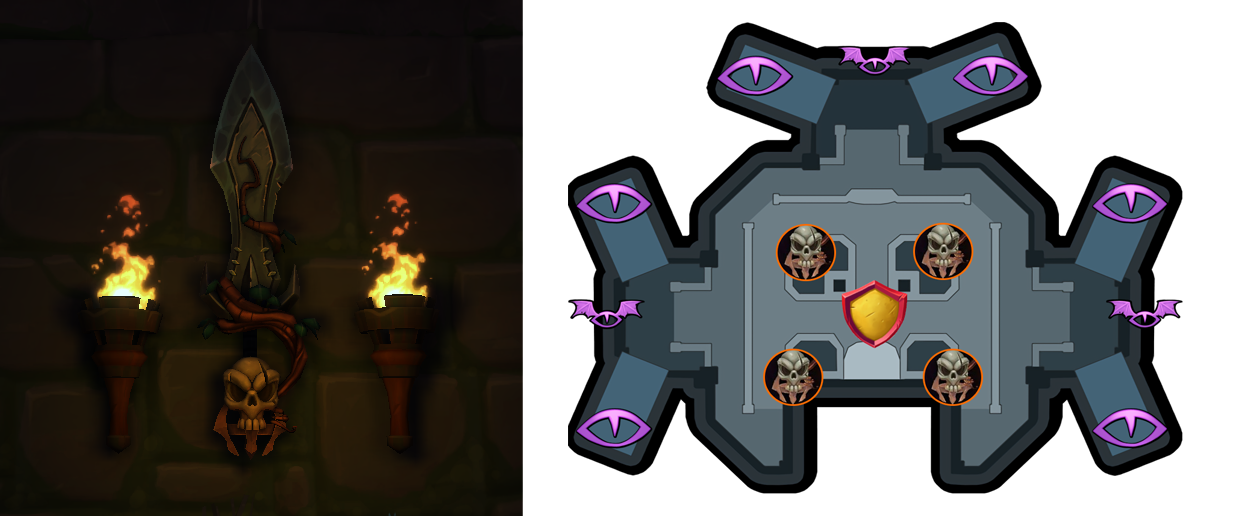
Once each wave begins, at some point during the wave a Spectral Knight will spawn from any of the ground lanes. Spectral Knights are large, floating Squire-like transparent ghosts that cannot be damaged by any weapons or stopped by any defense or barricade. They slowly move on the enemy path they spawn from directly towards the crystal, and do not stop until they get there. Once there, they attack the crystal doing 500 points of damage a second, which is a relatively small amount. They do not harm any defenses or heroes. Each Knight is either colored Red, Green or Purple, and when they spawn the game message will tell you what color they are in text, and the message text itself will also be in that same color as well. The Knights are not shown on the mini-map, but are represented on the actual map by a skull and crossbones icon of the same color that they are. Keep this in mind as you cannot tell by looking at the minimap how close they are to the crystal. To cleanse the Knights from the stage, you must use an environmental mechanism found on only this incursion. Under the center of the map, there is a lower level in the shape of a horseshoe that exits out at each of the 3 major spawn sections. On either side of each exit inside the lower level, you will find an altar with a sword, with 4 total altars. You can interact with the altar, which will cause it to change color from red, to green, and then purple - always in that sequence, and only one color change per an interaction. To cleanse a knight, you must set all four altars to the same color as the knight you want to cleanse. Once all 4 are the same color, approach any of the 4 altars to receive a color debuff, as shown on the screen as an attack symbol in the color of the altar, and it will last 45 seconds. You should get it automatically when you set the 4th altar, but you can reset the 45 sec timer at any time by just approaching any of the 4 altars, as long as they are all still the same color. Each knight floats in the air, but has an aura underneath it shown as a large colored circle. To cleanse the Knight, simply place your hero inside of that circle, or jump into the Knight, while you have a debuff that matches the same color. If successful, the Knight will vanish and a message will say "The Spectral Knight has been cleansed". You will lose the debuff once a Knight is cleansed, so if you have another Knight of the same color you also want to also cleanse, you will need to approach one of the 4 altars again to get the debuff, and then approach that Knight. You can only carry one color debuff at a time, so if another Knight of a different color is also on the map, you must set all 4 altars to that color, get the debuff, and go inside its aura to cleanse it. You will lose your current debuff if you switch heroes or die after acquiring it. The amount of Knights that spawn, when they spawn, and what color they spawn as are all random, but spawn rates do increase in frequency as you advance to each next wave. At the end of each wave, all 4 altars reset back to no color. You can interact with altars on the building phase, so it can be helpful to set one color before the wave starts. Each wave ends when the total amount of scheduled enemies are destroyed, and there is no requirement to cleanse any knights. All Knights on the map will vanish when the wave ends. Slow spawning enemies, slow moving minibosses, or stuck units can make the wave continue on, so ensure to clean-up all enemy units quickly to bring the wave to an end. It can be faster to clean up units, rather than adjusting 4 altars and cleansing a knight, so plan a strategy to finish each wave accordingly. The Knights do not damage the crystal very much, but several Knights can multiply the effect, so keep an eye on them. A Knight may spawn after the map is over, but it is of no consequence if it does. |
The Demon's Lair
The Demon Lord threatens to erupt the Embermount Volcano! Stop him by loading the catapult with burning stones that drop from his army of Lava Guardians.
- Map - Molten Citadel (Lost Dungeons).
- Playing Condition - 3 waves; enemies infinitely spawn until wave is complete; during all waves the Demon Lord boss spawns; Lava Guardians randomly spawn during all waves; each lane has one mutator from the common pool of mutators; ground and air lane enemies and minibosses are similar to Chaos 4 Expedition.
- Victory Condition - No cores are destroyed and the Demon Lord boss is defeated on the last wave.
- Special Weapon Reward -
 Bone Glove (Chance from Victory Chest)
|
Playing Tips for The Demon's Lair Chaos Four enemies have hefty defenses against attacks that cause slow, so be sure to adjust your layout to account for the Berserker Orcs that will rush out from the ground lanes. They can be stunned, frozen, and launched into the air though, so those are good tactics to stall them. Well placed barricades will also help to keep them from the crystal. Remember that you do not need to defeat any enemies on this map apart from the Demon Lord, so plan accordingly.
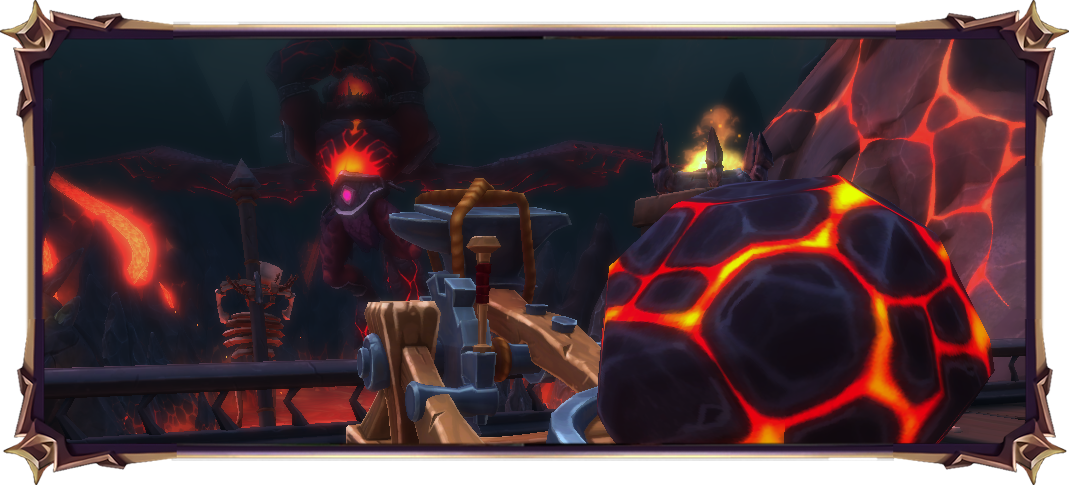
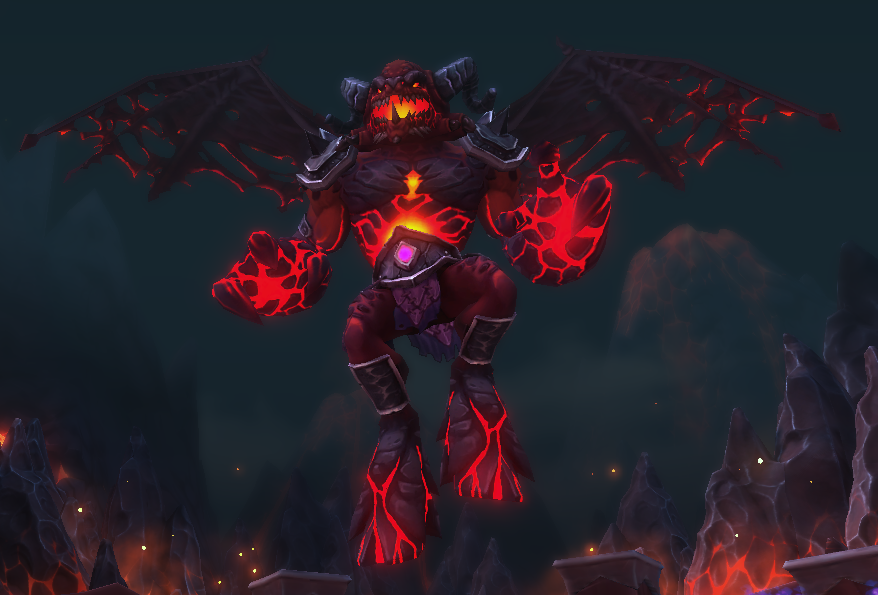
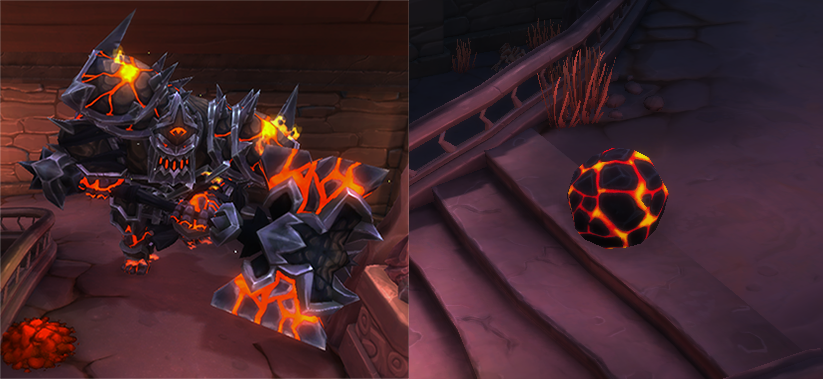
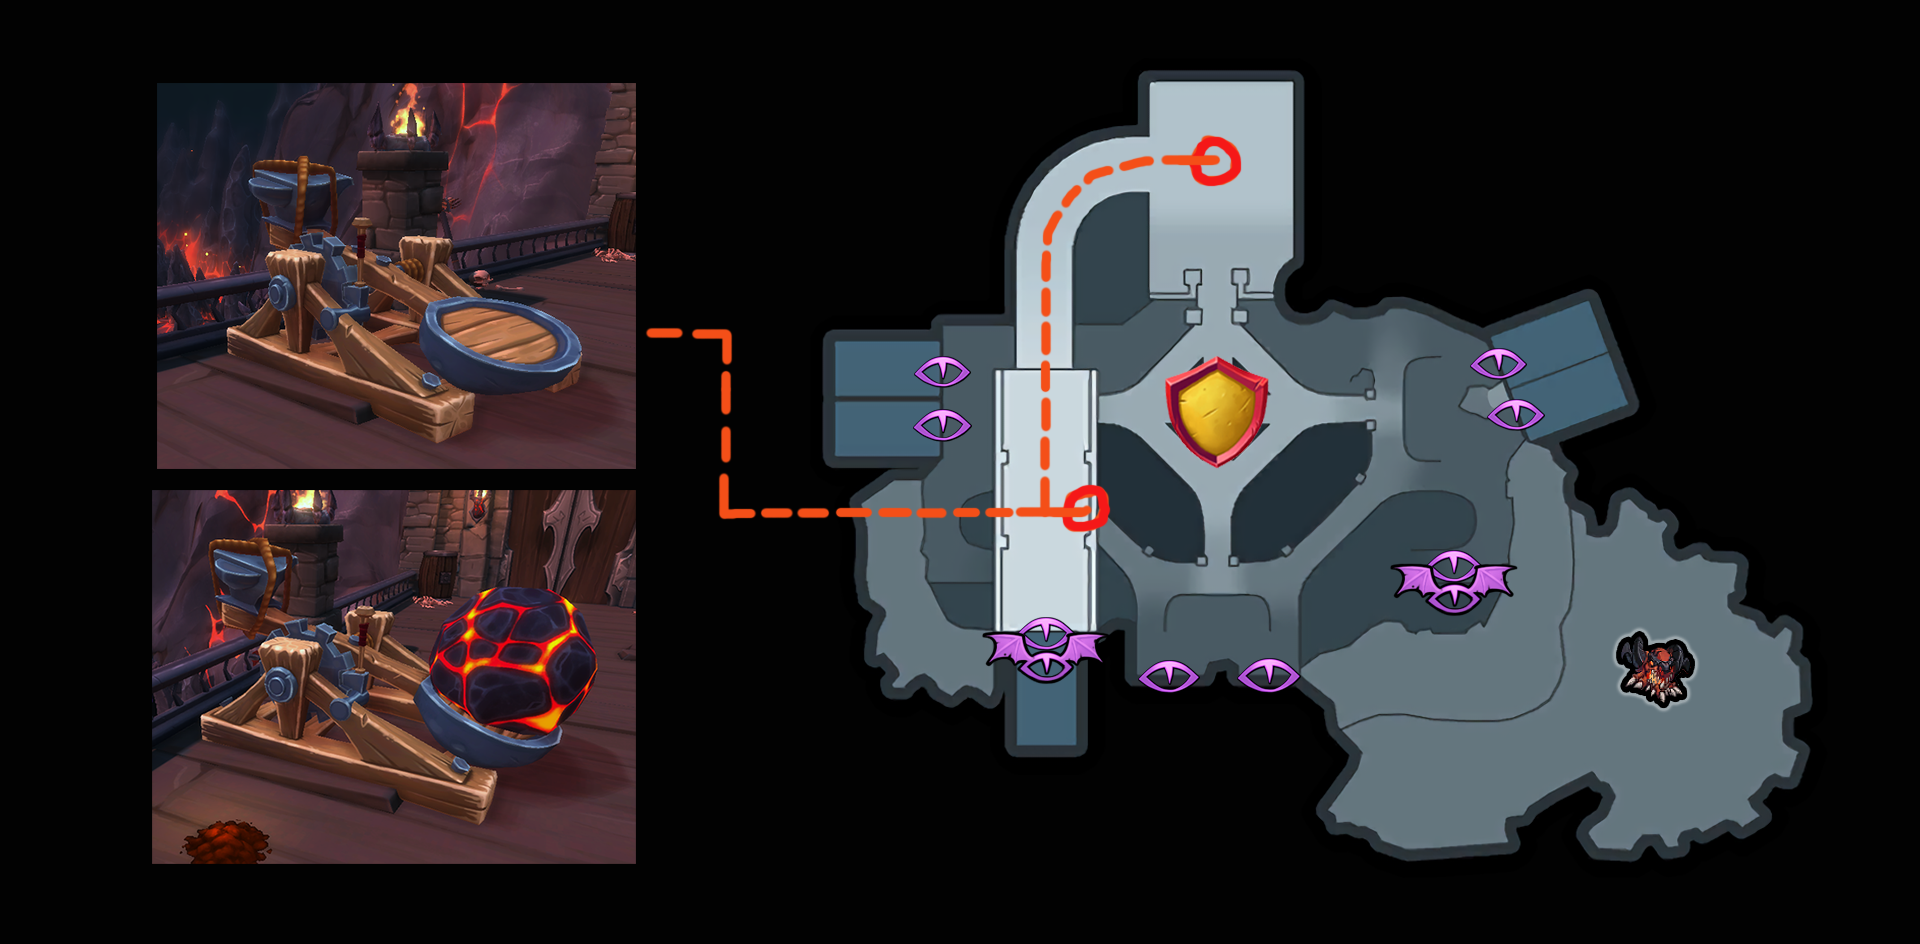
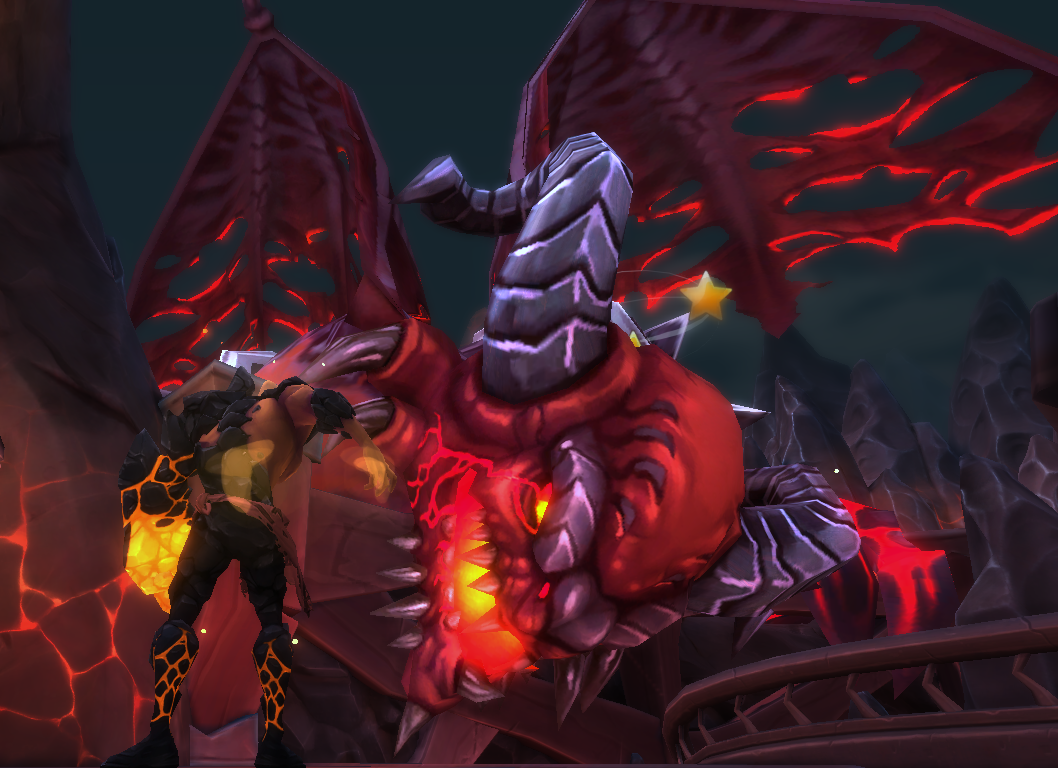
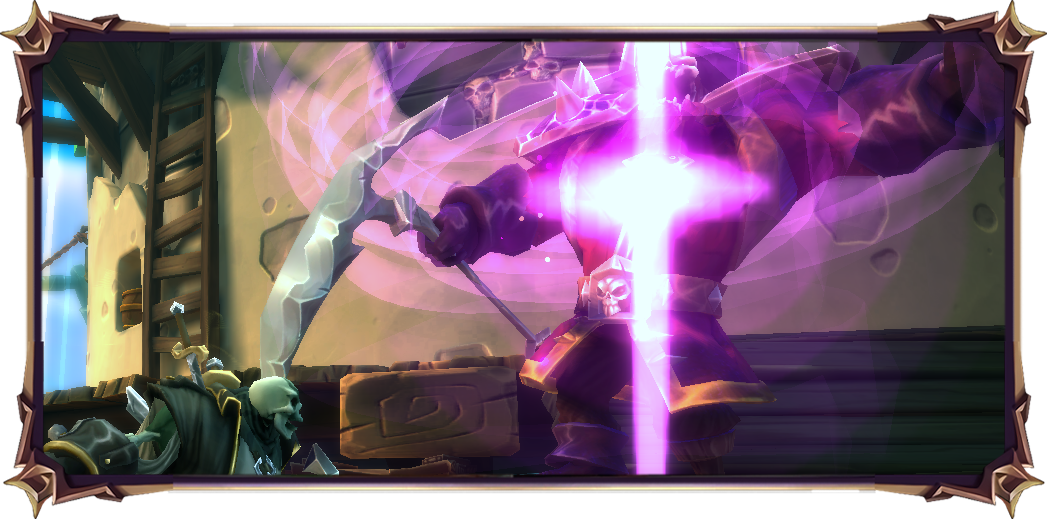
This is a stage fight against the boss - Demon Lord. Each wave will spawn infinite enemies until a third of his health has been taken away, on each wave. At the start of a wave, you cannot attack the Demon Lord, but he will attack you. He will ignite you, causing fire damage over time, and this attack hits all heroes and is unavoidable. The Demon Lord will also repeatedly throw lava balls at or near each hero, and do splash damage when they hit. This attack will hurt your towers and the crystal, so be mindful of where you are standing, and be prepared to dodge. The lava balls he throws at you can also snap you out of a jump animation, and can cause you to fall to your death if you are over a lava pool when you are hit by one. Gnash the Flame Lance (large Berserker Orc miniboss) will often spawn at the beginning of any wave. In order to damage the Demon Lord, you must first stun him. Once each wave begins, at some point during the wave a Lava Guardian will spawn from any of the ground lanes at random. A white exclamation mark will be shown above the area he will spawn from, but will vanish once he actually spawns, and no icon showing their location will exist after that. These units will spawn repeatedly over time, but are spaced out in frequency. Upon defeating a Lava Guardian, it will drop a lava ball on the ground. This is a Hero debuff that you can acquire by having your hero touch it. Once you touch a lava ball, it will vanish and you will see a lava ball debuff icon on your screen, and the hero will have a red glow to them. There is no timer on this debuff, and you can only carry one lava ball debuff at a time. More than one lava ball can be on the ground at one time. If you swap heroes once you have the debuff or die, you will lose it and need to get another lava ball. The lava balls the Demon Lord throws do not end up as debuffs on the ground in any way. Once you have the debuff, return to the area where your hero spawned when the map started and where you spawn when your hero dies. In that room, there is a hallway on the side that leads up some stairs to a long rampart that oversees most of the map. On that rampart you will see a catapult. If you approach the catapult while you have the lava ball debuff, the debuff will be removed from you and a lava ball will then become loaded onto the catapult for use. When the catapult is loaded with the lava ball and the debuff is removed, all other existing lava balls on the map or held by other heroes are also removed at that time. Before you use the loaded catapult, jump onto it. You cannot stand on the actual lava ball, but you can stand on the catapult where the ball is, and the graphics will just overlap. You can then activate the catapult, which will also launch you with it. The lava ball will then stun the Demon Lord. When you activate the catapult, a lightning debuff symbol will appear on the screen for 20 seconds, representing the total time the Demon Lord is stunned for. However, he must first fall down in range to be hit, and you cannot do any damage to him until his health bar shows up on the top of the screen. The actual time you have to damage him once he is in range is about 13 seconds. This is why you want to stand on the catapult, as it will launch you at the Demon Lord, and put you quickly within range. When you get launched, you can move your hero in mid-air. Try to land to the left of the Demon lord, near the Western double spawn point, so that you do not land on any lava patches and die. The Demon Lord will always fall over in the same location, and he can be damaged the Hero as well as by any defenses you build that are within range. Once the debuff timer is up, the Demon Lord will rise up again, and you will need to get another lava ball and stun him again. This process will continue until you lower his health by a total of one third of his total health. Once you lower his health by that much, that wave will end. When the wave ends, all lava balls and debuffs will be removed. On Wave 2, repeat the exact same process until you lower his health by another third, to end that wave. On Wave 3, you must then get his health to zero to end the wave and win the stage. |
Chaos V Incursions
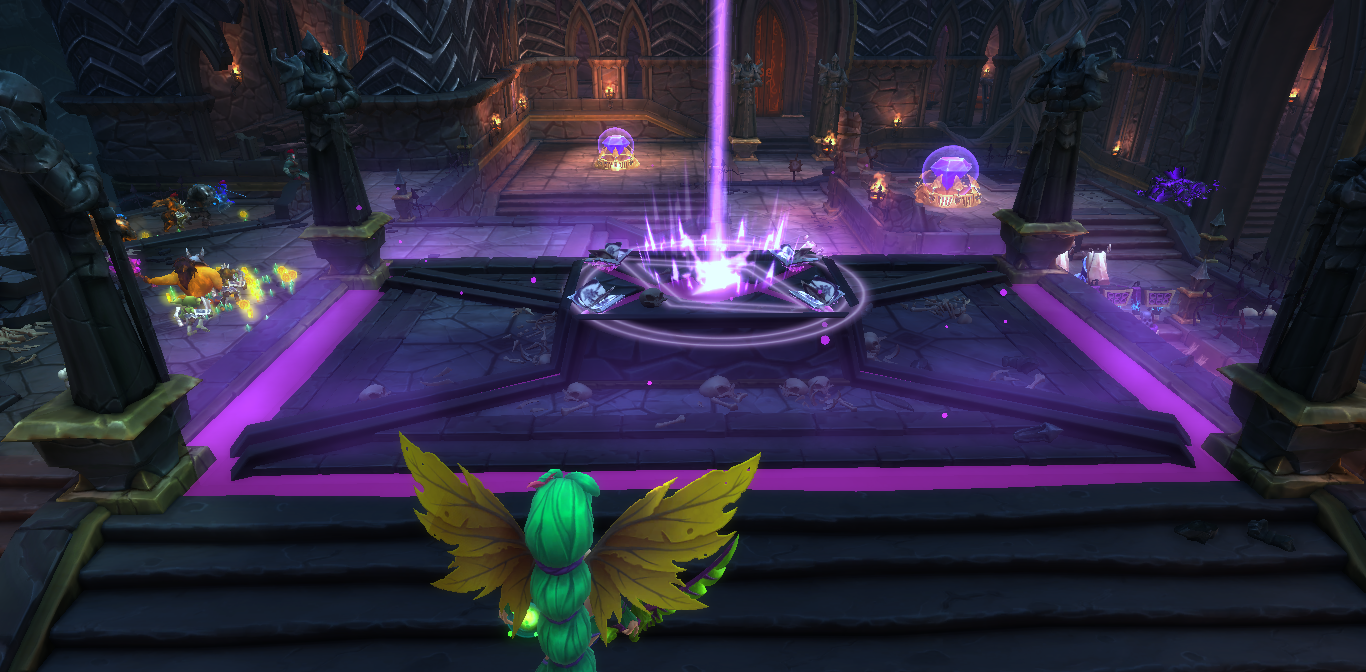
Altar of the Athame
The restless souls of traitorous assassins are bound to the fortress by a dark ritual. Stop the ritual and purge the evil spirits.
- Map - Crumbled Bulwark (Lost Dungeons).
- Playing Condition - 4 waves; This is a miniboss battle against Dark Realm Statues and Altar Assassins. Collect Ritual Items to perform the ritual that will summon the Dark Realm Statues, and then kill of all Altar Assassins. This map has the same enemy schedules for all ground lanes as found in a Chaos 5 expedition of this map but with higher Dark Assassin spawn rates, and the addition of Dark Prophets. Air lanes spawn only Altar Assassins. All normal minibosses may spawn. This incursion uses no mutators.
- Victory Condition - On Wave 4, all main crystal cores still have health, and all Altar Assassins are defeated.
- Special Weapon Reward (Chance from Victory Chest) -
 Shadowflame Knife
|
Playing Tips for Altar of the Athame Chaos Five enemies see the return of Cyborks once again and then the addition of Dark Assassins. Be sure the defenses you select can combat both of these units. Dark Assassins can be instantly removed by Huntress Geyser Traps and Mystic Viper Fangs. They are also susceptible to stun attacks, so after they latch on, just stand in front of or near any defense that stuns to remove them. Having a high hero HP value is also advantageous to surviving their attacks. Normal minibosses will spawn in lanes with the Goblin Siege Roller and Skarnash the Terrible (large version of a Dark Assassin) being the most common ones.
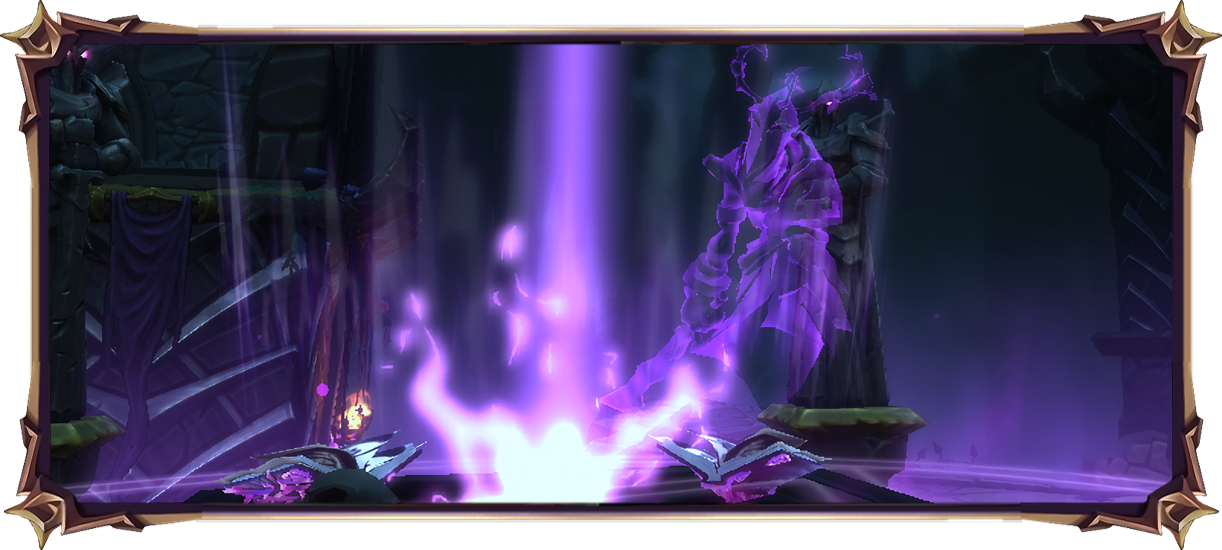
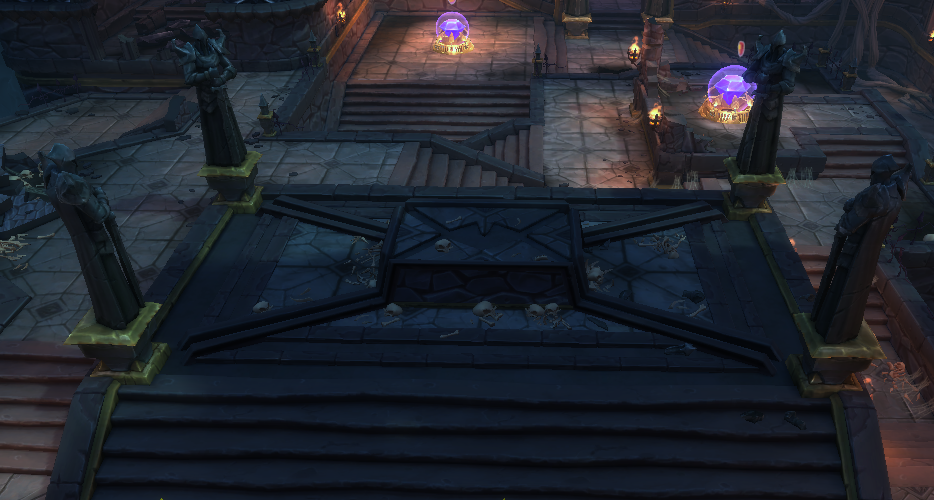
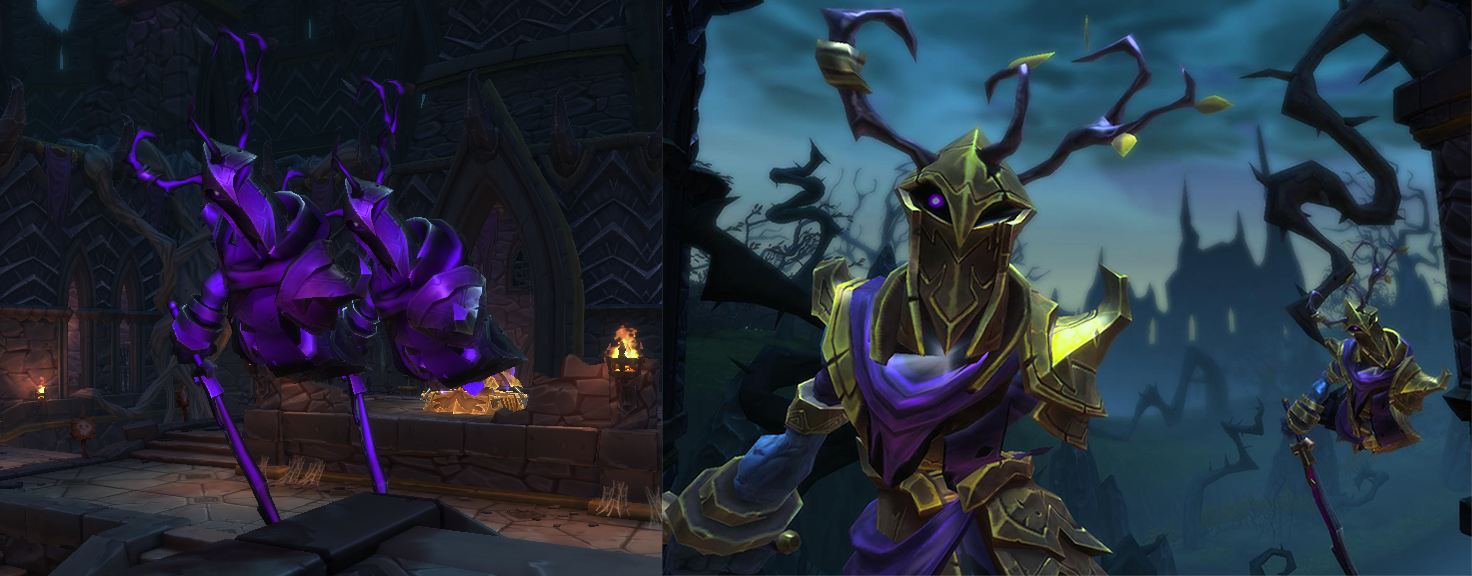
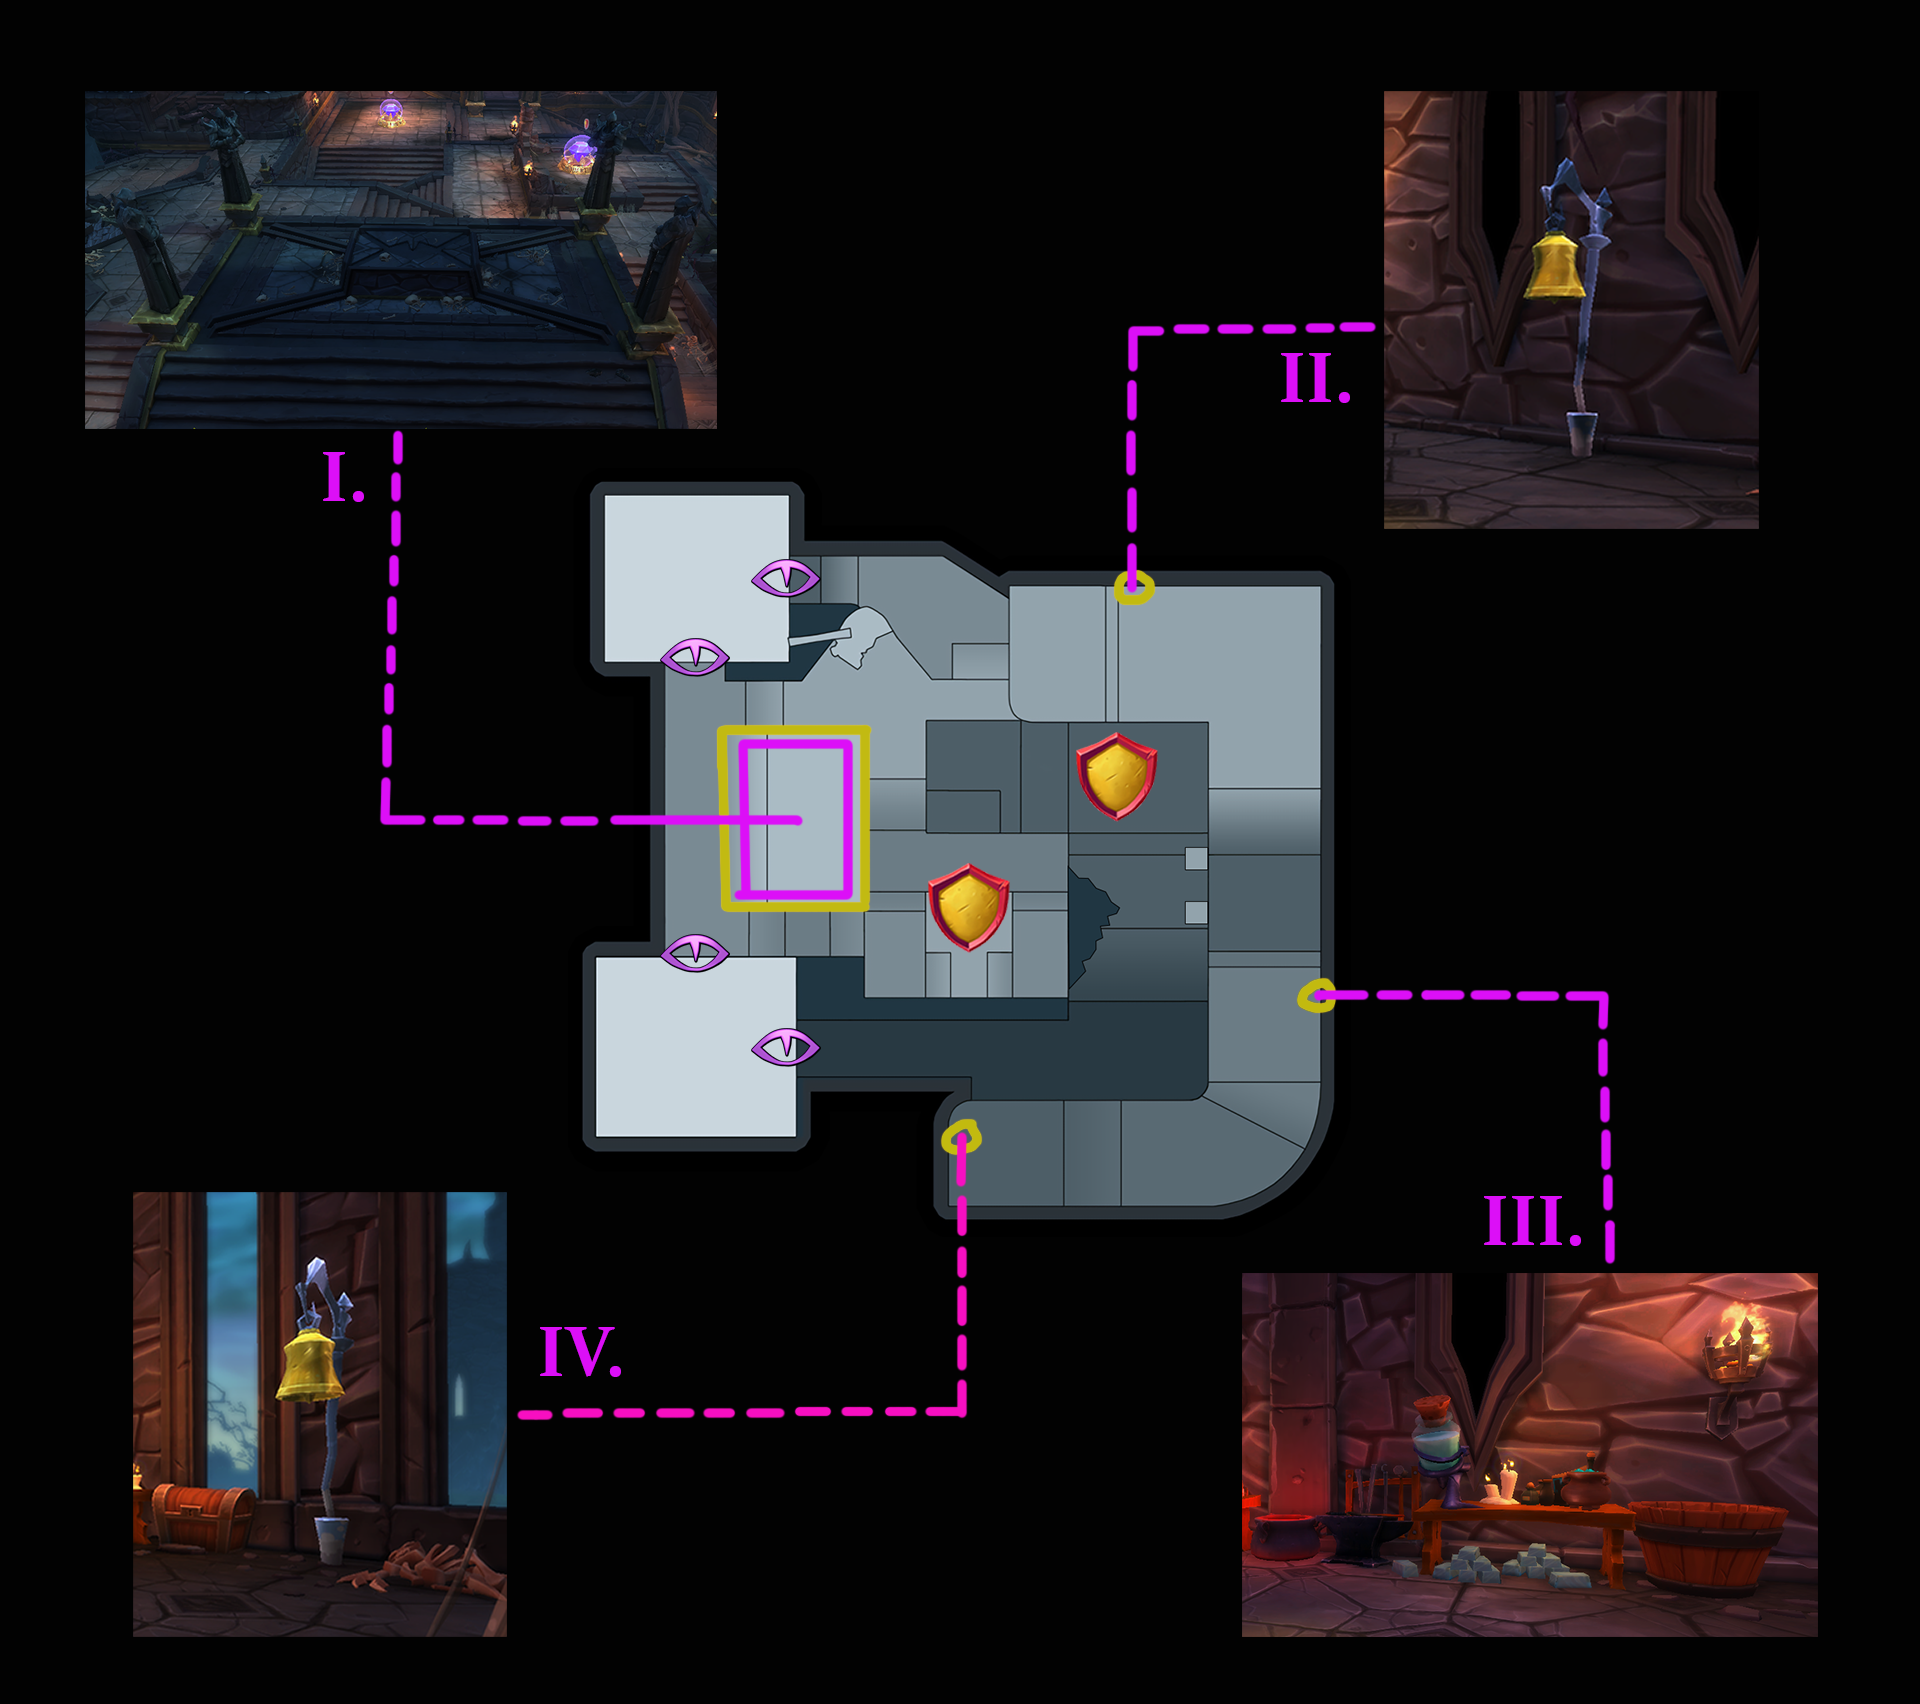
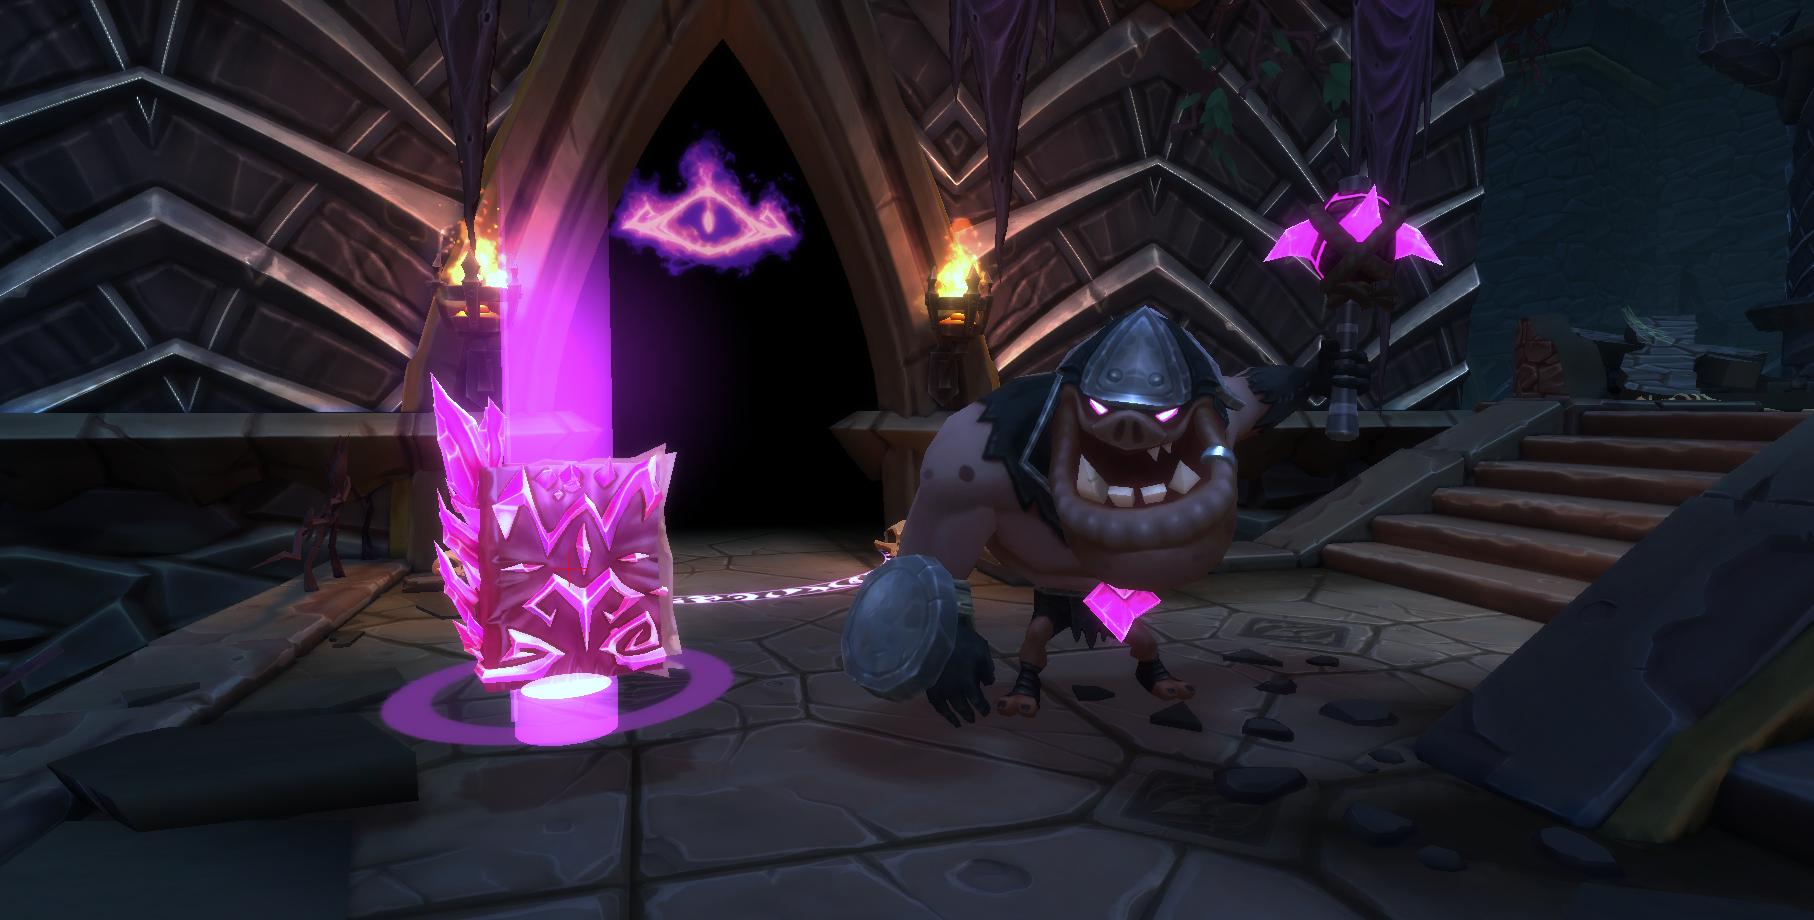
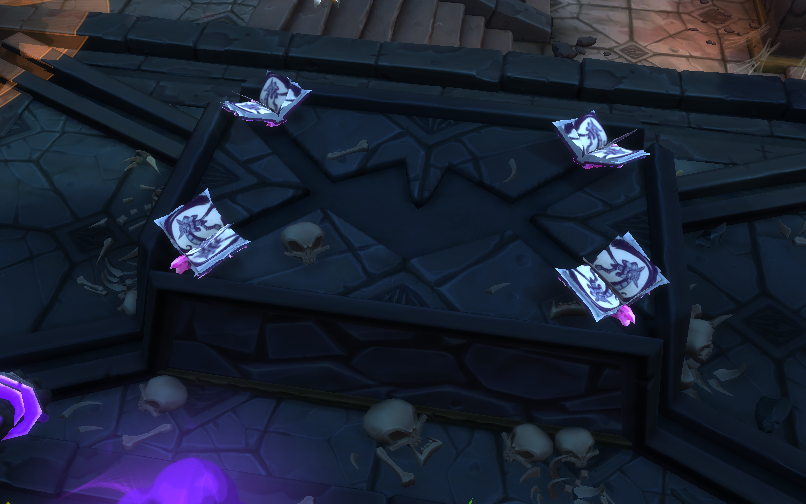
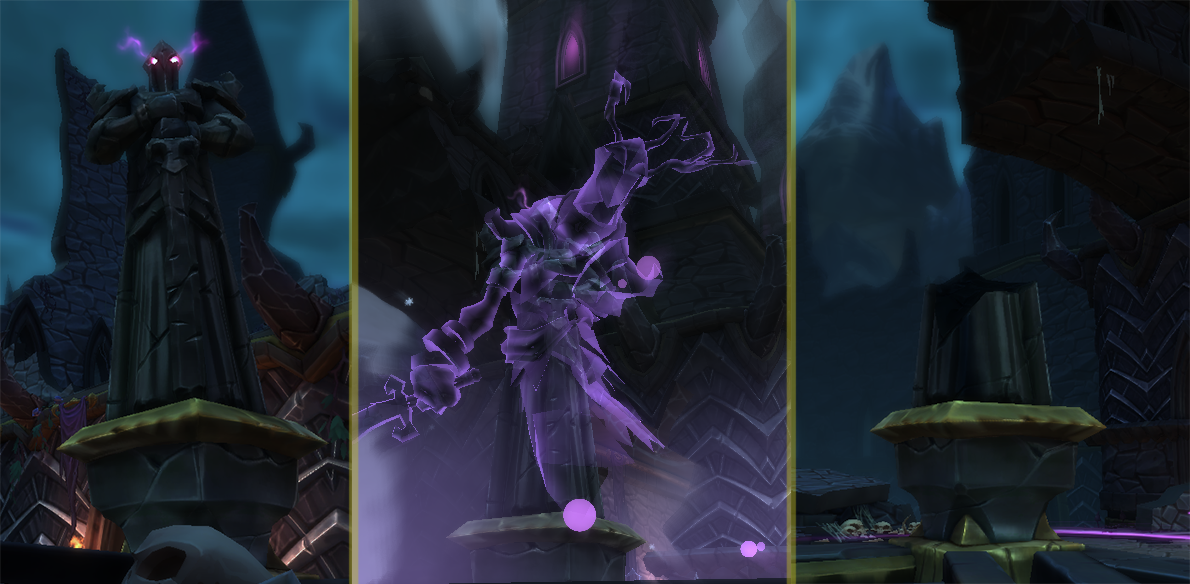
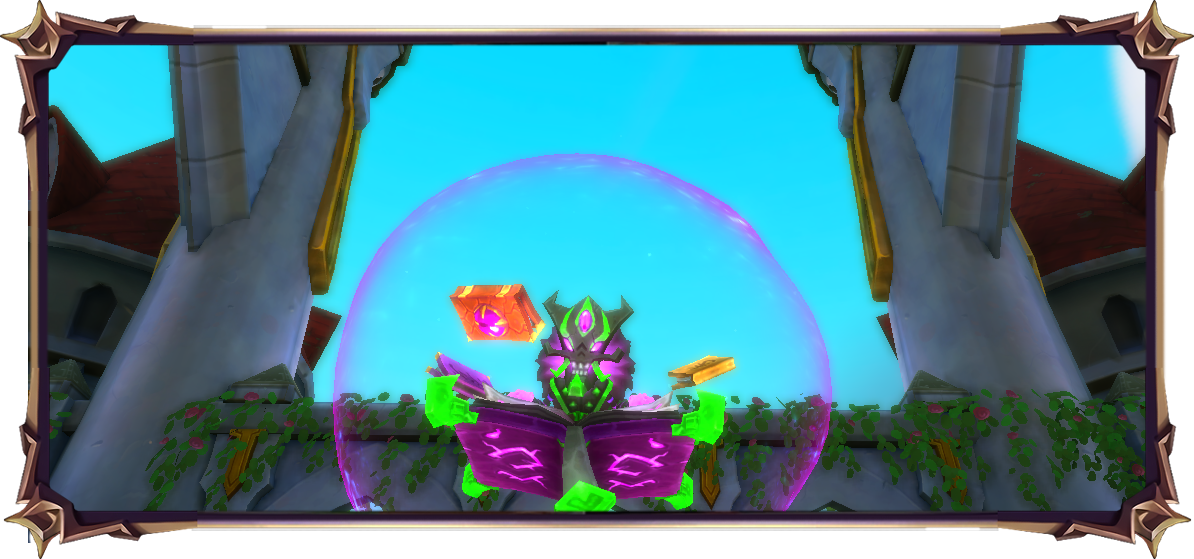
In the West center of the map there is a raised rectangular area with a coffin in the middle of it surrounded by 4 pillars. This is the Altar and the pillars are each hiding a Dark Realm Statue miniboss. The Altar will be motionless and does not do anything at first. You must summon a Dark Realm Statue miniboss by collecting 4 Ritual Items (purple books) dropped by defeating Dark Prophets. After a Dark Realm Statue miniboss has been summoned and defeated, the the Altar Assassins can then be damaged. You must defeat all of the Altar Assassins on the map to end that wave, and enemies will spawn infinitely until then. On Wave 1, 3 Altar Assassins will spawn. On Wave 2, 4 Altar Assassins will spawn. On Wave 3, 6 Altar Assassins will spawn. On Wave 4, 8 Altar Assassins will spawn. As play commences on the first wave, the ground spawns will all commence with their schedules and the air lanes will produce a set number of Altar Assassins each wave. Altar Assassins are a version of the Dark Assassin with a unique flair that are invulnerable to any attacks. Altar Assassins will hunt down and attack the hero, and will follow them the entire wave. They do not latch onto the hero, like Dark Assassins do. After they spawn, they follow their air lane to the crystal, and then seek out the hero the rest of the wave. If you come near one that just spawned, it will begin following you right away. They do not attack the crystal, so there is no need to try and stop them. They do not intentionally attack any defenses, however they will sometimes possibly attack a barricade on their path, so all you need to do is come near one and it will then chase you the rest of that wave. When attacking you, Altar Assassins can damage you along with what you are next to, so be mindful about standing on the crystal or next to a defense. They are covered in a dark skin flair while they are invulnerable, and they can be seen on the minimap as an air enemy. While you cannot damage then, you can still attack them and all crowd control effects will work. Slow, Stun, and Freeze can be applied and will have an effect. Defenses do not target these enemies, but Altar Assassins will be affected by any attack they are in the path of. This means that Tower based defenses are hard to hit them with, but Aura and AOE based ones are much easier to use against them. They move slow, and their attacks also push your hero slightly, moving them. You cannot pass under or jump through them. That can make getting around them a tad tricky at times, especially in large numbers that all follow you constantly throughout the wave. Be careful not to stand in a corner or next to a ledge when they find and attack you, as they can push you over the side or you can get trapped in a corner. To lead them away, just go stand anywhere else and wait for them to follow you. There are also stage mechanics that have been added to this incursion to assist you. On the East end of the map in the long horseshoe shaped hallway that the heroes first spawn in, there is the Assassin's Potion which is a table with a blue flask on it. You can interact with this flask to receive a blue potion debuff and gain invulnerability for 20 seconds. Dark Assassins can still attach to you, and you can still not jump through Altar Assassins, but you will take no damage from any enemy attacks. If you switch heroes or fall down a hole on the map, you will lose the debuff. Also found in the hallway on the North and South ends are a single bell (Known as Assassin's Bell) in both locations. Interact with the bell or attack it to ring it. Ringing the bell will stun all Altar Assassins on the stage for a few seconds. You can ring each bell once every 20 seconds. To stop and ultimately kill an Altar Assassin, you must first defeat one of the Dark Realm Statue miniboss at the Altar through a ritual to remove their invulnerability. As play commences on the first wave, the ground spawns will also intermittently produce Dark Prophets (an enlarged version of a Warboar, with light grey skin flair) on random lanes, but usually a different one each time cycling through the 4 ground lanes. A white exclamation mark will be shown above the area each will spawn from, but will vanish once it actually spawns, and no icon showing their location will exist after that apart from a regular enemy on the minimap. Once defeated, the Dark Prophets will drop a purple book on the ground called a Ritual Item. Be careful not to place or aim defenses too close to a spawn point so that when the Dark Prophets drops the Ritual Item, it falls outside of the spawn point and you can reach it. When you collect the Ritual Item by touching it, it will disappear and then show as a light grey debuff icon on your screen, and your hero will glow purple. Once you have a Ritual Item debuff, give it to the altar by touching the coffin anywhere with your hero. The Ritual Item debuff has no timer, but if you switch heroes or die, it will be lost. You can only hold one Ritual Item debuff at a time. You must collect and bring 4 Ritual Items to the altar to activate the summoning Ritual. There is no time limit for getting all 4 Ritual Items, and they will remain there until all four are collected. The altar will display a message after each Ritual Item is given successfully, and you can also see them placed on each corner of the coffin as you progress. The game will announce when the Ritual can be used to summon the Dark Realm Statue ("Dark Realm Ritual is Ready"), which will be immediately after the 4th Ritual Item is placed. Once the 4th Ritual Item is placed, all other Ritual Items currently on the map or in the possession of a hero will disappear, although more may spawn after this event as Dark Prophets continue to spawn. To activate the Ritual, you must interact with the coffin. When you do this, you will call forward a single Dark Realm Statue miniboss that is located in place of one of the 4 pillars, with the Northeast, Northwest, Southwest, and Southeast pillars always activating in that order, with only one being summoned on each of the 4 waves. The Dark Realm Statue does not move from its location, but will attack you. The ritual only lasts 10 seconds. When the ritual is activated, the entire altar area is covered in a purple glow. If the Dark Realm Statue is not defeated during the ritual, it will vanish and any heroes inside the altar area will be killed instantly, no matter your defense or health level. You will then need to collect 4 more Ritual Items to summon it once again. If you summon it again, the Dark Realm Statue will have the same remaining health as when it disappeared. When the Dark Realm Statue has been defeated, all of the Altar Assassins on the stage will lose their dark skin flair and they can then finally be damaged and killed. Each wave is over once all Altar Assassins on the map have been defeated. Defeated Dark Realm Statue pillars will be shown as broken in half afterwards. Once Wave 1 is over, repeat the whole process over again on each remaining wave. |
Power Surge
Powered Up Towers build instantly, but they only last for a limited time!
- Map - Dragonfall Bazaar (Dragonfall Town), 5 waves.
- Playing Condition - All defenses are built with zero build time, with increased attack and speed stats, but disappear from the map after 35 seconds. This map has the same enemy schedules for all lanes as found in a Chaos 5 expedition of this map. All normal minibosses may spawn from any lane. No mutators are applied to any lanes.
- Victory Condition - On Wave 5, the main crystal core still has health, and all enemies are defeated.
- Special Weapon Reward (Chance from Victory Chest) -
 Glaive of the Storms
|
Playing Tips for Power Surge Chaos Five enemies see the return of Cyborks once again and then the addition of Dark Assassins. Be sure the defenses you select can combat both of these units. Dark Assassins can be instantly removed by Huntress Geyser Traps and Mystic Viper Fangs. They are also susceptible to stun attacks, so after they latch on, just stand in front of or near any defense that stuns to remove them. Having a high hero HP value is also advantageous to surviving their attacks.
The timer defenses disappears by starts from when the defense is placed, no matter what phase it is, so it is recommend to ready-up the stage as quickly as you can on each build phase. If you sell a defense before it disappears, you get the mana back. If the defense disappears due to the timer, you will not get any mana from it. You can still upgrade defenses if you choose to, but the mana may be better saved to build more towers with instead. The increased power and speed make it so that upgrading is not really necessary. Dryad Trees do not ever disappear, so that all Dryad defenses can be used. This is the only defense that does not disappear. You can spam this blockade and build many of them in every lane as a way to block enemies. Abyss Lord defenses still have a 4 second lag from placement until activation, so these defenses may not be a good choice for this incursion. EV2 Reflect Beams fire constantly at a fixed rate, no matter what size the beam is, and the node only travels along the bottom of the beam. So if you use EV2, you don't have to worry about what size you make your nodes. Don't forget to defend the air lanes as well. This incursion is one of the hardest ones to play solo. If you are not in a coordinated team, you may consider waiting to play this incursion until you have chaos 7 gear. Playing in a team of 4 has the best chance at success as 3 players can DPS support each of the three lanes, and one hero can be the designated builder. The supporting heroes should give all mana to the builder each round. Be mindful not to let the Subcore go down if you can, so that you are not facing 4 ground lanes then. |
Chaos VI Incursions
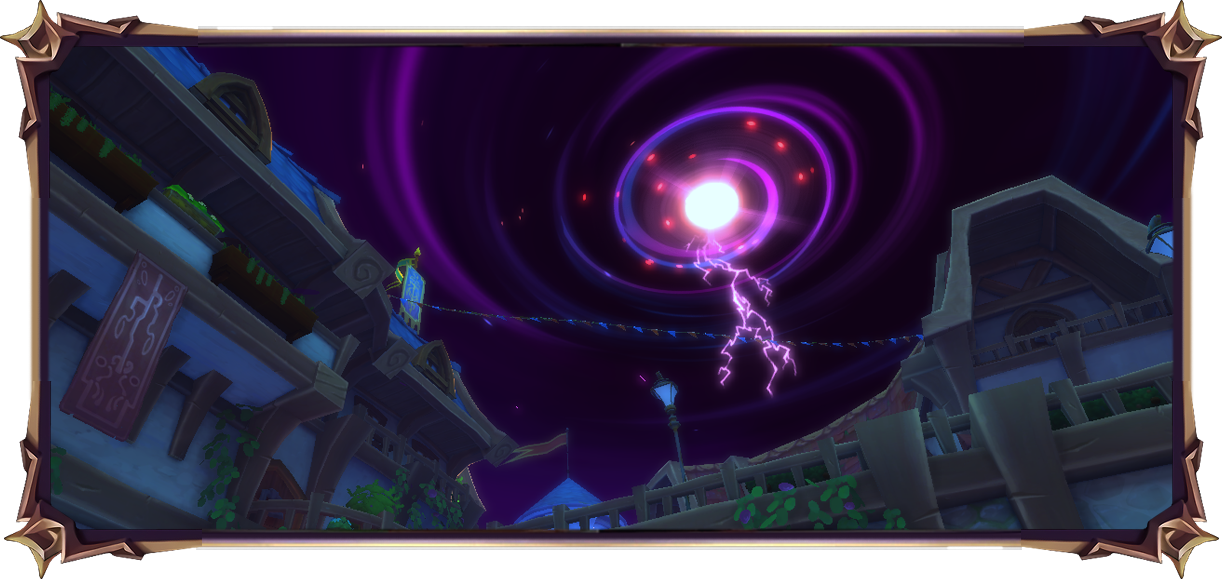
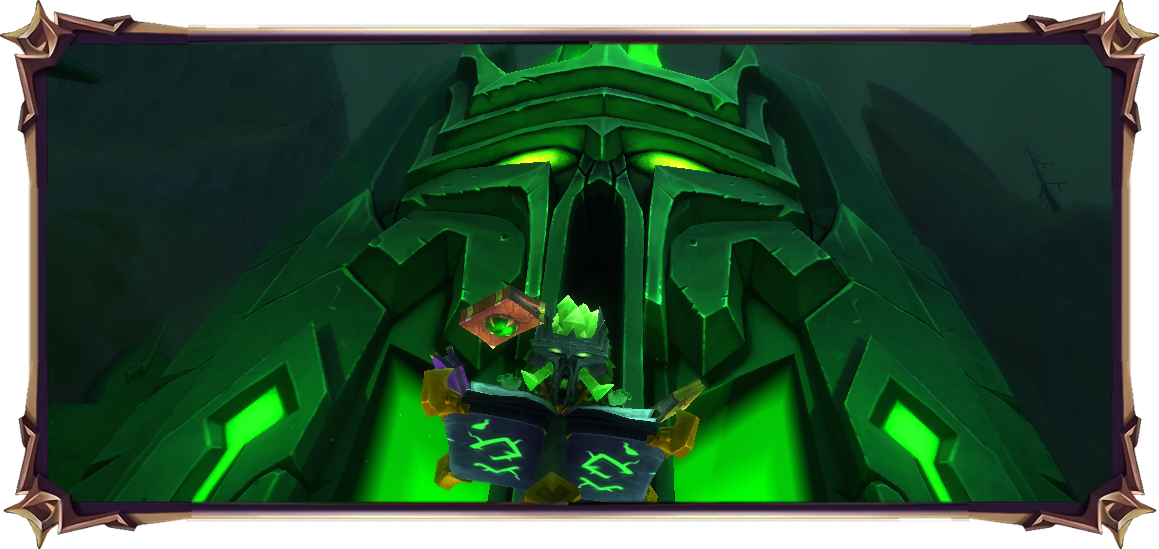
Malthius Incursion
Map - The Ramparts (Dragonfall Castle), 5 waves.
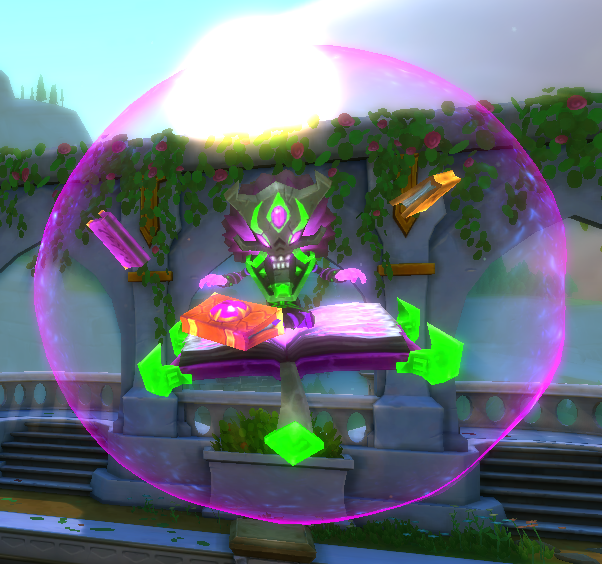
Playing Condition - Each wave, marks are placed on the map that heal enemies. You will also face the miniboss Malthius on the final wave. This map has the same enemy schedules for all ground lanes as found in a Chaos 6 expedition of this map, and one additional lane has been added as a skeleton spawn point under Malthius. Air lanes spawn on less waves. All normal minibosses may spawn. No mutators are applied to any lanes.
Victory Condition - On Wave 5, all main crystal cores still have health, and all enemies are defeated. This map has 2 different Special Weapons it unlocks and getting them both in the victory chest at the same time is possible.
Special Weapon Reward 1 - ![]() Megashark (gun for Gun Witch). Has 1 spread, 8 speed, and fires "Meteor Bullets". This special weapon can drop from a victory chest
Megashark (gun for Gun Witch). Has 1 spread, 8 speed, and fires "Meteor Bullets". This special weapon can drop from a victory chest
- Special Weapon MOD - Meteor Bullets, "Rapidly fires Meteor Bullets that pierce one additional enemy target or reflect off of one surface for 50% damage." The values are fixed, so it does not matter what level the weapon is or what level the MOD is. The projectile will apply any crowd control or elemental values of the hero upon contact with the enemy. This attack pierces, but that does not include Chaos enemy's defenses such as Geode or Vanguard shields.
Special Weapon Reward 2 - 35px Tsunamic Jester (bow for Huntress). Always has 5 shots per second, Jester Arrows shot pattern, and 5 projectiles. This special weapon can drop from a victory chest.
- Special Weapon MOD - Jester Arrows, "Fires a column of Jester Arrows that pierce up to 5 targets."
|
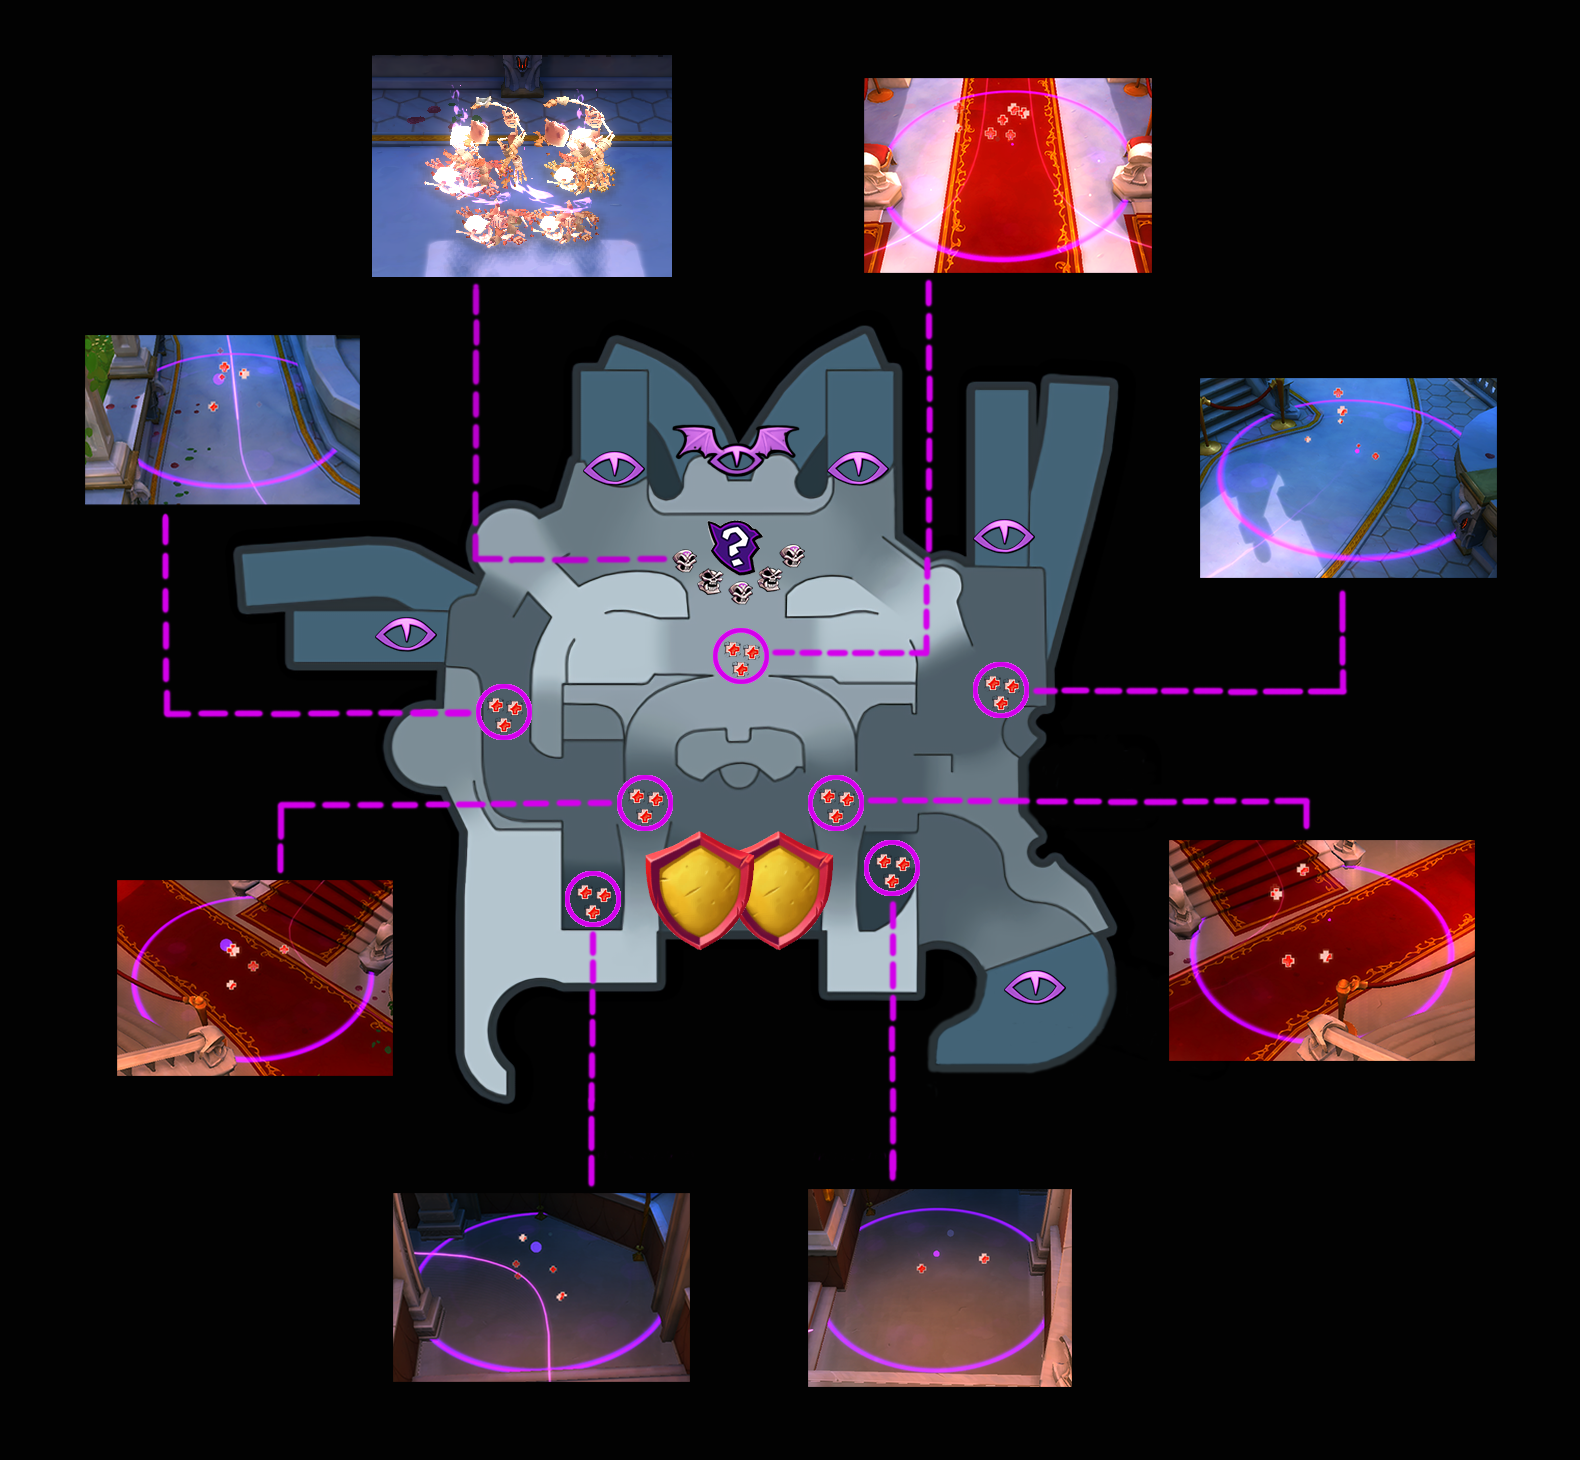
Playing Tips (WARNING - SPOILERS): Chaos six enemies add Hex Throwers to schedules. These units have very long range and target towers and barricades. It is best to try and kill them with traps, nodes, and auras before they get in range of anything they target. If you need to protect a defense against them, the best way is to use EV2's Reflect beam. Set one up in front of the defense you want to protect, with about one hero length away from it as the spears they throw penetrate the shield slightly and will hit your defense if it is placed too close. Dark Assassins also spawn, so be prepared to remove those as necessary. What makes this incursion unique are the enemy healing marks placed on the map. There are red and purple auras that heal enemy units at a rate of 100% every 1 second. Each wave, the number of auras will increase in predesignated locations on the map. (See the pictures to the right and below for the locations.) On Wave 1, only 1 aura is present, on the north double lane right where the two upper staircases end. On Wave 2, 2 more auras are added (3 total) just outside each of the archways on either side of the doorway control crystals. On Wave 3, 2 more auras are added (5 total) part of the way down on both the West and East lanes. On Wave 4, 2 more auras are added (7 total) near the control crystals, at the bottom of each staircase. On Wave 5, no more additional auras are added. The auras heal the enemies, but do not cure ailments or statuses. They have no effect on the hero or your defenses. All normal minibosses may spawn, but typically just one spawns on Wave 3 from the "Gazebo Tower" spawn in the NW corner. Sniper Warbleed (large version of a Hex Thrower) also commonly spawns on Wave 5 from any lane. A miniboss named Malthius (large version of a Dark Mage) is present as an NPC in the center of the map, hovering above the skeleton spawn point, right where the two lanes merge. He does not do anything on Waves 1-4, but on Wave 5, he will drop down and become a miniboss about mid-way through the battle. Once he is killed, all Healing Marks dissapears. Also on Wave 5, 2 Ogres will spawn from the 2 lanes on either side of Malthius. The Orges will spawn first, and then Malthius drops soon after that. There are no air lanes for Waves 1 and 2, and then both air lanes are active for Waves 3-5. |
Return of Maldonis
Map - Temple Of The Necrotic (Rotting Ravine), 5 waves.
Playing Condition - Each wave Death Marks are placed on the map by Maldonis. You will face the miniboss Maldonis on the final wave. This map has the same enemy schedules for all lanes as found in a Chaos 6 expedition of this map. All normal minibosses may spawn. No mutators are applied to any lanes.
Victory Condition - On Wave 5, all main crystal cores still have health, and all enemies are defeated.
Special Weapon Reward - Meowmere (light sword for Squire/Dryad/Barbarian). All Meowmere are usable by all sword wielding heroes regardless of the description. This special weapon can drop twice from a victory chest.
- Special Weapon MOD - Master of Cats, "Primary Attacks fire a piercing Meowmere projectile dealing XX% Ability Power as Magical Damage and bounces off three surfaces. Projectiles fire once per second and explode dealing XX% Ability Power as Magical Damage." Chaos 6 values [96-125%, 96-125%], Chaos 7 values [106-135%, 106-135%]. The projectile is a small cat head with a long trailing rainbow and cat "meow" sound that fires out at chest level horizontally and bounces forward in an upper arc motion on melee swings. The projectile will apply any crowd control or elemental values of the hero upon contact with the enemy. This attack pierces, but that does not include Chaos enemy's defenses such as Geode or Vanguard shields.
|
Playing Tips (WARNING - SPOILERS): Chaos six enemies add Hex Throwers to schedules. These units have very long range and target towers and barricades. It is best to try and kill them with traps, nodes, and auras before they get in range of anything they target. If you need to protect a defense against them, the best way is to use EV2's Reflect beam. Set one up in front of the defense you want to protect, with about one hero length away from it as the spears they throw penetrate the shield slightly and will hit your defense if it is placed too close. Dark Assassins also spawn, so be prepared to remove those as necessary.
What makes this incursion unique are the Death Marks that Maldonis summons throughout each wave, placed randomly on the map. Maldonis will do an animation, and then somewhere on the map, a small green area on the ground will light up, and that small area will then be a Death Mark for the rest of that wave. Death Marks cause hero damage over time when you stand upon them, similar to how poison or fire might damage you. They do not damage defenses or cores. The damage will cease as soon as you step outside of the mark area. The mark only does damage if you are standing on the ground, and does not affect those who are standing on elevated objects within the mark or those in the air above one. Maldonis continues to summon marks as long as play continues on each wave, and the frequency of the summons increases on each wave. On Wave 1 you may see 6 or more marks, and by Wave 5 you can see 18 or more. Marks can overlap, and do only minor damage. When marks are summoned, they are not visible on the minimap, but a white skull and crossbones icon will show on the screen for each one, as long it exists. All current marks on the map vanish at the end of each wave. On Wave 5, Maldonis summons a huge amount of Marks all at once, right before he descends as a miniboss, and no more Marks will spawn after that. A stage mechanic has been added to this incursion so that you can remove Death Marks. In the Southeast part of the map, the Subcore is called the Holy Artifact. Touching the Subcore with your hero will gain you a sparkling golden glow debuff around your hero, known as the Holy Aura. The debuff will last 45 seconds, but no icon will show it on the screen apart from the cosmetic. To vanquish a Death Mark, have your hero walk anywhere on the ground inside a Death Mark while you have the Holy Aura, and it will then instantly disappear. You cannot do this from the air or on an elevated surface. You will not lose the debuff when you vanquish a mark, so you can eliminate as many Death Marks as you can touch in the 45 second time frame. If you swap heroes while you have the debuff or die, you will lose it. To get the debuff again, touch the Holy Artifact for another 45 second debuff. There is no requirement to remove any marks apart from the fact that it will make playing the stage easier. All normal minibosses may spawn from any lane, and they spawn at a high rate on each wave. There is a Slekeleon miniboss named Trikk that spawns on the left side of Maldonis on Wave 3, then regenerates at the beginning of each subsequent wave, and has a unique purple flair. There is also a Orc miniboss named Treet (i.e. both are a Halloween theme, as in "Trikk" or "Treet") that spawns on Wave 4 to the right of Maldonis, and has a unique zombie skin flair. A new miniboss named Maldonis the Dark (large version of a Dark Mage) is present as an NPC in the North center of the map, in front of the Temple entrances. He does not attack as a miniboss on Waves 1-4, and on Wave 5 he will drop down and become a miniboss you must defeat mid-way through the wave. Sniper Warbleed (large version of a Hex Thrower) also commonly spawns on any wave, from any lane, and more than one lane at a time is possible. On Wave 5, you will often face 3 random miniboss spawns, Trikk regenerating, Maldonis the Dark, and possibly one or more Sniper Warbleeds. |
Chaos VII Incursions
Bastille Master
Map - Buried Bastille (Lost Dungeons), 5 waves.
Playing Condition - All players/heroes on this map will share a pool of lives. The map has only 1 crystal and is timed once combat begins. You will face the miniboss the Bastille Master on the final wave. This map has the same enemy schedules for all lanes as found in a Chaos 7 expedition of this map. All normal minibosses may spawn. No mutators are applied to any lanes.
Victory Condition - On Wave 5, the main crystal core still has health, all enemies are defeated before the timer reaches zero, and all heroes do not lose all lives. In the victory chest for this stage you can find this stage's weapon, the Haunted Halbred, and also a Demon Scythe (from Revenge of the Yeti) can also possibly drop.
Special Weapon Reward 1 - Haunted Halberd (staff for Apprentice/Adept). Has 4.5 speed, 1 spread, and Spooky I flair shots.
- Special Weapon MOD - Ghastly Halberd, "Secondary Attack summons Ghastly Halberds that attack for XXX% Ability Power as damage, twice per second, for 15 seconds. You can summon up to X"" Chaos 7 values [263-485%, 5-9 halberds]. Using the secondary attack button allows you to choose a small area on the ground where the Ghastly Halbred will be placed. All enemies inside that circle will be hit with damage at the same time. Ghastly Halberds can be stacked upon one another and overlap.
Special Weapon Reward 2 - Demon Scythe (Tome for Abyss Lord). This special weapon is not unlocked for purchase from completing THIS incursion map, it is instead unlocked from the Revenge of the Yeti incursion map. It can however be dropped from the THIS incursion map.
- Special Weapon MOD - Demonic Scythes, "Secondary Attacks summon Demon Scythes that deal XXX.X% Ability Power as Magical Damage and pierce up to 5 targets. Charged Attacks deal XXX% Ability Power as Magical Damage and pierce up to 10 targets." Chaos 7 values [143.31-192.9%, 425.2-518%]. Primary Attacks are unaffected. The scythe is a cross-shaped spinning projectile that shoots one at a time, straight forward at chest level. You can rapid fire the scythes by quickly pressing the secondary attack button. The charged version is bigger in size. The projectile will apply any crowd control or elemental values of the hero upon contact with the enemy. This attack pierces, but that does not include Chaos enemy's defenses such as Geode or Vanguard shields.
|
Playing Tips (WARNING - SPOILERS): Chaos seven enemies add Kobolts to schedules. These are flying units that spawn from ground lanes and follow those paths. They target towers, and will fly quickly forward once attacked, and explode on impact disabling everything in the explosion area for almost a half minute. It is recommended not to build any towers near spawn points. You can build a Weapon Manufacturer near the spawn point, as the Kobolt will dive to attack it, but will not disable it. Auras work very well to damage them as they are nor targeted or disabled. You can also put up high health towers or barricades between the spawn point and your towers to protect them. Mystic Obelisks work very well for this task.
What makes this incursion unique is that you are given a pool of 4 lives that all heroes on the map share. A Life Counter is shown in the center of the screen at all times so that you know how many lives you have left. If any hero dies during combat phase, that number will be reduced by one, for each death. Deaths on build phase or after the map is complete do not subtract from this total. If the last hero on the map dies during combat and the life counter is set to zero, you will fail the incursion. You begin Wave 1 with only 1500 Defense Units, whereas on Expedition you start with 2400. All normal minibosses may spawn. 1 will spawn on Wave 2, 2 on Waves 3 and 4, and 3 will spawn on Wave 5. The minibosses on Waves 2-4 all come from the Southeast and Southwest spawn points, and then on Wave 5 those two locations spawn again as well as the North spawn point will also spawn an additional normal miniboss along with the Bastille Master. No minibosses will come from the Central Southeast and Central Southwest spawn points. When you begin Wave 1 you will have infinite building time. However, once you begin combat phase on Wave 1, a timer begins with 1300 seconds (a little over 21 min) on it. This timer continuously counts down from that point forward, and includes all of the following build and combat phases until the stage is over. This stage only has 1 crystal to defend in the center of the map, close to where you spawn, as opposed to the expedition version that has 4 crystals. This incursion also introduces a new miniboss, the Bastille Master. This is a unique miniboss to the game, and can spawn as a miniboss in other game modes. The Bastille Master appears as a NPC on the North end of the long bridge on Waves 1-4, and then on Wave 5 she disappears and then spawns from the North spawn point, usually along with another normal miniboss near the same time. What makes this miniboss unique is her ability to summon shield around her and any surrounding enemies that reflects all damage back to its source and instantly kill it. If one of your defenses attacks her while this shield is up, it will be lost. Same for your hero, if you attack any enemy with this shield active, you will lose a life. The shield is not affected by traps, auras or nodes though. The shield can still be activated while the Bastille Master is stunned. |
Revenge of the Yeti
Map - Drakenfrost Resort (Drakenfrost), 5 waves.
Playing Condition - This map has all new frost enemy ground schedules for all lanes on this map. Only Yeti minibosses will spawn. No mutators are applied to any lanes.
Victory Condition - On Wave 5, all main crystal cores still have health, and all enemies are defeated.
Special Weapon Reward - Demon Scythe (Tome for Abyss Lord). This special weapon is only unlocked for purchase by completing THIS incursion map. It does not drop on THIS map. See Bastille Master for more info.
|
Playing Tips (WARNING - SPOILERS): This stage has the same number of ground and air lanes, however the ground enemy schedules are all completely new. Air lanes are still the same, and have no new enemy types. Five new enemy units have been added and one new miniboss. All new enemy additions are frost based and can cause heroes and defenses to be chilled if their attacks connect (or are within the Frost Orc's aura). Chilled status causes attack speed to drop, and can stack all the way to zero speed, at which point your Hero will become Frozen, and can be killed by the next attack. Frost units are all immune to slow and freeze effects, as well as bubble and petrify attacks. Frost enemies will not target auras and traps, but anything inside the frost aura will be hit. Frost enemies will take double damage from any flame element attacks.
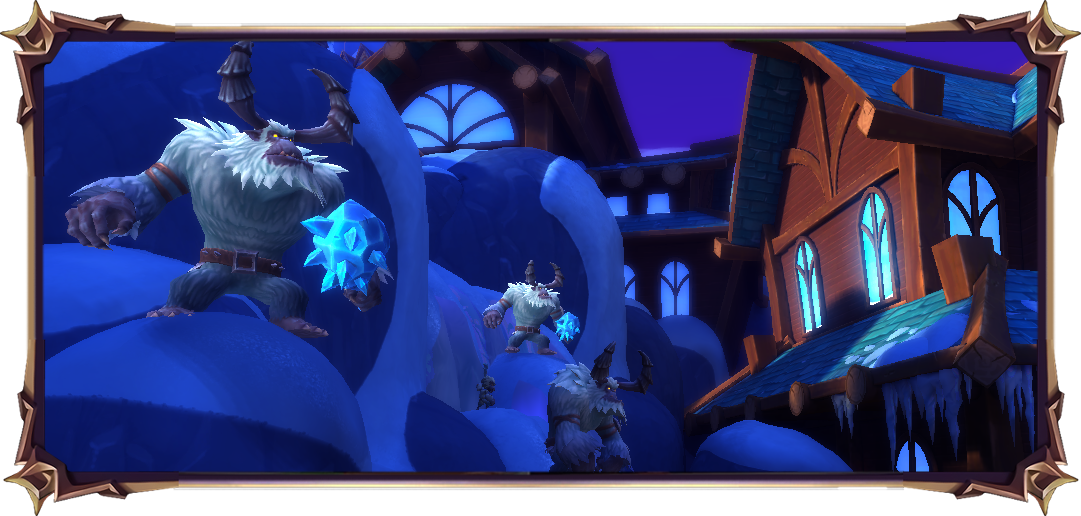
The new enemies include the following. The Frost Goblin, which is a frost skin version of a Goblin who uses melee attacks up close. The Frost Goblin Bomber, which is a frost skin version of a Goblin Bomber, who uses bombs from range. The Frost Orc, which is a frost skin version of a Orc who emits a cold aura around them (similar to the Drakenlord ice shield) that slows any hero or defense it comes in contact with and the auras can stack. The Frost Mage, which is a frost skin version of a Dark Mage, who attacks towers from a distance, heals enemies, and summons regular skeletons. The Frost Drakin, a frost skin version of a Drakin, who fires frost balls from range. The Frost Goblin Bombs, Frost Mage attacks, and the Drakin Ice Balls can all be reflected by the Reflect Beam without becoming slowed. The new miniboss is the Yeti. He is the only miniboss that will spawn on this incursion on all waves. He throws snowballs that hit with a splash and chill anything in the area, and he will target all defenses. 1 will spawn on Wave 2. 2 will spawn on Wave 4. 3 will spawn on Wave 5. He will randomly spawn only from 3 lanes - the lane under the bridge, and the 2 lanes in the Southwest. |
Dark Awakening
Map - Plunderer's Paradise (The High Seas), 5 waves.
Playing Condition - The miniboss Capt. Dreadbones constantly respawns during waves. This map has the same enemy schedules for all lanes as found in a Chaos 7 expedition of this map. All normal minibosses may spawn. No mutators are applied to any lanes.
Victory Condition - On Wave 5, all main crystal cores still have health, and all enemies are defeated - which does not include the respawning version(s) of Capt. Dreadbones.
Special Weapon Reward - The Last Word (medium axe for Squire/Countess/Barbarian). Although all axe wielding classes can use this axe, the mod is only valid for the Barbarian. This weapon drops as campaign tier. This special weapon can drop from a victory chest.
- Special Weapon MOD - Captain's Fury, "Increases Barbarian's Hero Damage by XXXX and increases Hero Damage in and AOE around the Barbarian by XXXX." Chaos 7 values [6479-9089, 6480-9090]. The AOE has very limited range directly around the Barbarian.
|
Playing Tips (WARNING - SPOILERS): Chaos seven enemies add Kobolts to schedules. These are flying units that spawn from ground lanes and follow those paths. They target towers, and will fly quickly forward once attacked, and explode on impact disabling everything in the explosion area for almost a half minute. It is recommended not to build any towers near spawn points. You can build a Weapon Manufacturer near the spawn point, as the Kobolt will dive to attack it, but will not disable it. Auras work very well to damage them as they are nor targeted or disabled. You can also put up high health towers or barricades between the spawn point and your towers to protect them. Mystic Obelisks work very well for this task.
A new miniboss has been added - Capt. Dreadbones. He charges forward quickly once he spawns. All normal minibosses can spawn on this map, which can include Capt. Dreadbones as well. One miniboss will spawn from the Southeast corner on Waves 2 and 3, and then in addition another will spawn on Wave 4 from the central Southwest point (2 total), and on Wave 5 a third will spawn from the top drawbridge in the Southwest as well (3 total). What makes this map unique is how Capt. Dreadbones spawns. At the beginning of Wave 1, Capt. Dreadbones will spawn randomly as a normal miniboss on the map from one of about 12 designated locations, see the below map (pic coming soon). This does not include any of the lane schedules and cannot be seen on the enemy list there. Once defeated, he will respawn after some time passes. He will continue to respawn as long as the wave continues. To end a wave, defeat all enemies on the map, which does not include the respawning version(s) of Capt. Dreadbones. When the last enemy is defeated, Capt. Dreadbones will vanish. Be aware that if Capt. Dreadbones also spawns from a scheduled lane as a miniboss (as shown on the enemy list for that lane), then that version of Capt. Dreadbones must be defeated as well to end the wave. The rate that Capt. Dreadbones respawns after being defeated will increase as the wave count increases. It is not necessary to defeat the respawning Capt. Dreadbones on any wave. You can even put up a barricade/tower in front of him, and just keep healing the defense, instead of fighting him. One respawn point is on the deck of the ship, right next to the main mast and right next to the main Crystals, so be ready to defend that possibility or he will quickly end the map. During each wave, right before Capt. Dreadbones spawns, a red "X" will show up on the ground (but not on the map or any screen icon) denoting that he is about to appear. That red "X" may still be on the ground at the end of a wave, but that does not mean that Capt. Dreadbones will respawn from that point in the next wave. No icon on the screen or minimap appears before he spawns, and when he does spawn his miniboss and screen icon will be visible as a normal miniboss would appear. Occasionally, Capt. Dreadbones can double spawn at once from the same location. |
Jester's Revenge
Map - Wild West (The Wild West), 6 waves.
Playing Condition - To be added...
Victory Condition - On Wave 6, the main crystal core still has health, all enemies are defeated before the timer reaches zero, and all heroes do not lose all lives.
|
Playing Tips (WARNING - SPOILERS): |
Prime Incursions
What are they?
Prime Incursions are the next tier of Incursions after Chaos VII Incursions. This tier consists of harder versions of all the current Incursions from previous Chaos difficulty tiers, along with a few maps from Adventures, like Wyvern's Den, and Harbinger's Warship. Some of these incursions have a boss fight at the end. The Prime Incursions are divided into seven groups with each group getting harder than the last.
Rewards
1. Victory Chest loot
Aside from the Victory Chest having a chance to drop the incursion's respective special weapon, the chest also has a chance to drop one more item:
Prime Weapons - These weapons with unique new models drops with Chaos VIII or Chaos IX stats fully upgraded, depending on which difficulty you do. Furthermore, they are also rolled with curated "fan-favorites" shot/swing types and M.O.D.S. Each Prime group would have a pool of 4 different prime weapons.
2. Hyper Shards -
Each Prime Incursion group cleared for the first time would reward a Hyper Shard. And after clearing all seven groups, you'll earn the seventh Hyper Shard as a capstone reward. These hyper shards are identical to the ones earned from Mastery, meaning you'll be able to have two sets of them when you complete both Mastery and Prime Incursions.
History
-
 ??? : Prime Incursions added.
 -
 4.0 : Dark Awakening Incursion added.
 -
 3.0 : Some Incursion have been added to Adventures.
 -
 1.1 : Revenge of the Yeti Incursion added.
 -
 1.0 : Incursions and its special weapons added to Chaos difficulties, separated into tiers with a slightly different loot roster.
- [Early Access 19.0] : Removed Nightmare difficulty and leaving Incursions only on Hard difficulty. Also removed special weapons from Incursions's loot table.
- [Early Access 17.0] : Added Dawn of the Blood Moon Incursion and the Wayfarer.
- [Early Access 16.3] : The 2015 Spooky Event have returned as a permanent incursion - Return of Maldonis.
- [Early Access 15.4] : Added Altar of the Athame Incursion.
- [Early Access 14.4] : Added The Demon's Lair Incursion.
- [Early Access 14.2] : Added Power Surge Incursion.
- [Early Access 13.5] : Added Bastille Master Incursion.
- [Early Access 13.3] : Added The Kobold Bling King Incursion.
- [Early Access 12.0] : Added Spectral Assault Incursion.
